Tasks or the Task Scheduler is the central location for all tasks in the system. Tasks can be created to perform many different actions in enVisual, such as scheduling reminds for meetings, or even to launch processes. The Task Scheduler looks like this.
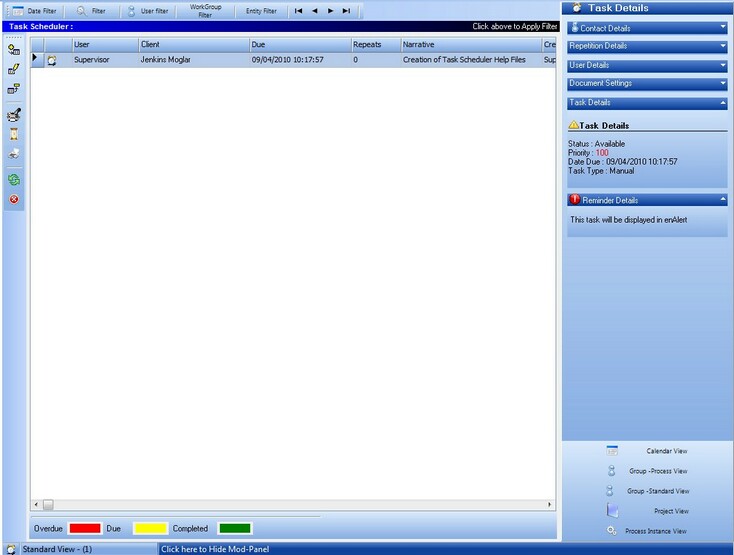
The task scheduler is split up into six main parts, these parts will be discussed in detail in this section. These parts are the toolbar, the band colour selector, Task Filter, Task Details Section, Mod Panel, and the Main Task Display.
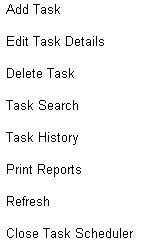
The first part to discuss is the toolbar on the left, this contains many buttons that can be used to change or view the different tasks in different ways.
Add Task When pressing this button, the user will be presented with the add task wizard, for information on the add task wizard see the Add Task section.
Edit Task Details When pressing this button, the user will be presented with the add task wizard in edit mode so that the selected task can be modified, for information on the add task wizard see the Add Task section.
Delete Task The Delete task button is simply used to delete the selected task, the user will be prompted to confirm deleting a task.
Task Search The task search button can be used to find tasks, this is useful when there is a large number of tasks listed in the task scheduler. Task Search uses the Global Search function, to search for a task, simply enter the narrative of the task you wish to find, you can enter the full narrative or part of the narrative. When the search is completed you can either right click on the search results to edit the selected task, or double click on a task to be taken to the task in the task scheduler.
Task History The task history button can be used to show completed tasks either by user, by contact, by task (when multiple occurrences are used) or to show all tasks.
Print Reports When clicking on the Print Reports button the user is presented with four options, Task By User, Task By Contact, Overdue Tasks and Current Task. All four of these options will launch the tasks report, but each option will display different information.
Refresh The refresh button simply refreshes the task list.
Close Task Scheduler This Close button will simply close the task scheduler window. |
The next part of the Task Scheduler is the band colour selector, this part is simply used to change the colour of the different tasks in the task scheduler. Overdue, due and completed tasks all have a different colour, these colours can be changed by clicking on the coloured boxes in this section of the Task Scheduler.
|
The next part of the Task Scheduler is the filters, tasks can be filtered on Date, Task, User, Workgroups or entities. The task scheduler filter is show below.
When the user clicks on one of the filters they will be presented with controls to set the filter criteria. Depending on which task view the user is on some or all of these filter options may not be available.
|
The next part of the Task Scheduler is the Task Details section, this section is on the right hand side of the task scheduler screen. The task details section shows details on the contact, repetitions, users, documents reminders and completions. |
The next part of the Task Scheduler is the Mod Panel, this shows variance information relating to the selected task, this panel also contains a View control which controls the view of the main task scheduler window.
There is now an option available to Show or Hide the Detail Bar, to use this option you can simple click on the Hide Mod-Panel Button shown below.
While the Mod Panel is hidden there is a button to show the Mod Panel, and a button to select which view to open, these buttons are shown below.
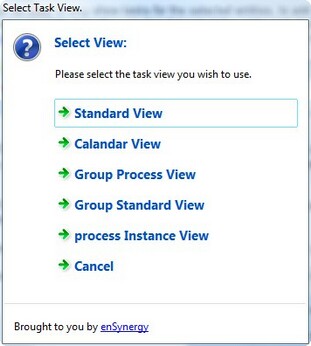
When pressing the select View button you will see the below screen to select which view you want to use.
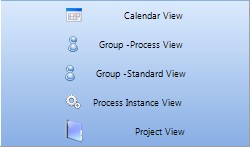
The different views that are available are the Standard View, Calendar View, Group - Process View, Group - Standard View, Process Instance View, and Project View.
Standard View The Standard View is the default view when the task scheduler is launched and shows all the tasks in a list format based on the filters selected by the user.
Calendar View For more information on the Calendar View please see the Calendar View page.
Group - Process View The Group - Process View shows tasks that have attached processes based on the group that the task is assigned to.
Group - Standard View The Group - Standard View shows tasks based on the groups that they are assigned to.
Process Instance View The Process Instance View shows tasks that will be created to be attached to processes at many times. This is used for when a process has to be done for an entity on a regular basis, for example performing credit checks on customers one a year. This view shows each process instance, indicating when the process was last run, when the process will run next and how many repeats the process has left.
Project View The Project View is the storage place for all timesheet tasks, however this view does not simply list all of the timesheet tasks, this view lists all of the projects that timesheet tasks have been created for. Each project listed here shows the Project name, budget hours, total hours recorded, budget amount, total amount, and the number of timesheet tasks that have been created for each project. For more information on what each of these items is please refer to the Projects Page. To View the individual timesheet tasks for each project you can double click on the project, to return to the project list you can right click on any timesheet task listed and click back to Projects view. |
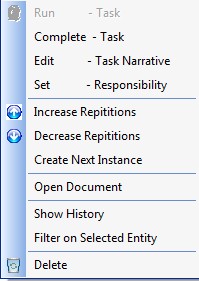
The Final part of the task scheduler is the task list main window, this list changes depending on the view that is currently selected. Generally this shows a list of all tasks based on the filter criteria, however the way this list is displayed changes depending on the view. Depending on which view the user is on, the right click menus change slightly, below is the right click menu from within the standard or the group - standard view.
The Right click menu has options to run a selected task, this is used if the task has a process attached to it. Tasks can be completed, edited and changed user from the right click menu. The increase and decrease repetitions options are used for tasks that are scheduled to repeat on a regular basis, and using these options simple changes the number of times that this task will repeat.
|
