Each recorded customer in enVisual could have ongoing Projects (Commonly known as matters) that they are working on, and therefore will have a budget for the matter, enVisual keeps track of this matter and their allocated budget. By default, the system will display these as 'Projects', but this label can be changed within enVisual Configuration under the 'System Labels' tab.
The Matters can be viewed by a Customer grid or by a Matter Grid. To open the Matter grid, click the Matter button in enPractice, this will display the below grid in either Customer or matter view.
Viewing matters by Customer will display a list of customers, selecting one will show all created/assigned matters on the right.
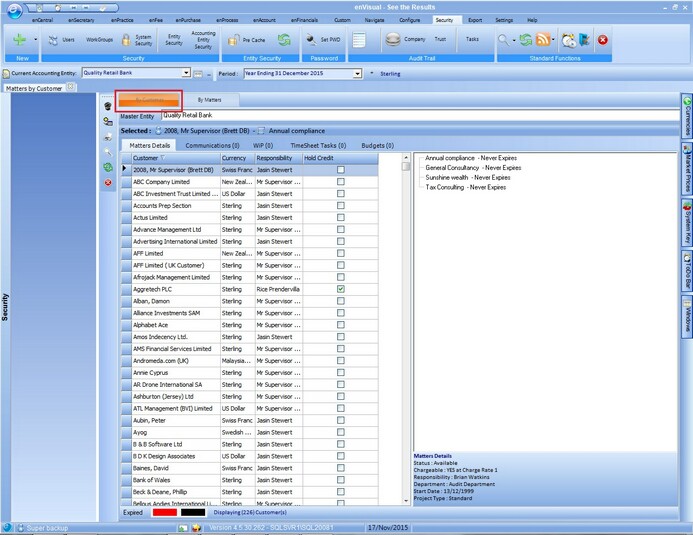
From the customer view there are the following options;
|
Matter Wizard |
Add Matter |
|
Print Standard Reports |
|
Opens the GES Global Entity Search option |
|
Refresh |
|
Close |
Also from the right click menu are options to Add Matter, Edit Customer Details, and Launch enFocus.

Within the customer details, details tab there are configurable settings for the customer including the ability to capture time sheets even if the customer is on credit stop.
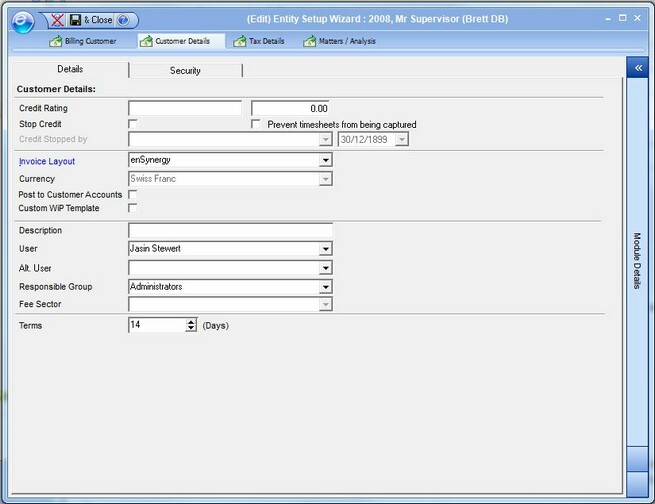
There are multiple options available in the Matters grid, these are described below.
There are three ways to add Matters in the By Customer view, the first way is to right click on the customer in the grid and click add matter, the second way is to click the Matter wizard button on the top left side of the grid or alternatively click on the add matter button beneath the wizard.
if you click the matter wizard button you will be presented with the following screen where you can select 1 or many customers to add the matter to.
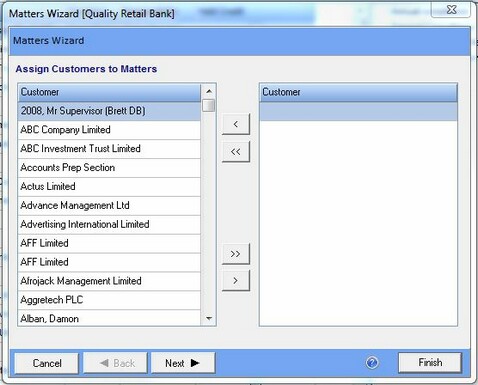
Once you have selected the customer(s) to add the matter to you can click the next button to be presented with the following screen. If you right click on a company and click add matter you will also be presented with the same screen.
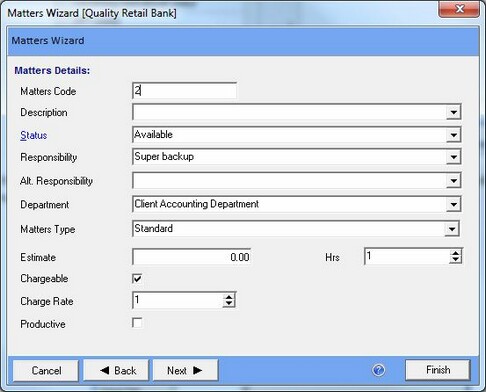
On the add Matter screen you can enter the following information:
| • | Matter Code - A unique code should be entered for the matter. |
| • | Description - General description / name of the matter. |
| • | Status - Now a customisable field which includes items such as Available, Unavailable, Accrued or Deleted. |
| • | Responsibility - the enVisual user who is in charge of managing this matter. |
| • | Alt Responsibility - an alternative enVisual user who is in charge of managing this matter. |
| • | Department |
| • | Matter Type |
| • | Chargeable - Box that affects whether or not the matter will be chargeable when used to create time. |
| • | Charge Rate - the amount that this project is charged per unit. |
At the bottom of the window additional Budget information is stored.
Once you have filled in this information you can click to view the next tab. The Following 2 screens are used to enter information for reporting analysis and the nominal ledger accounts to post the transactions for the matter to.
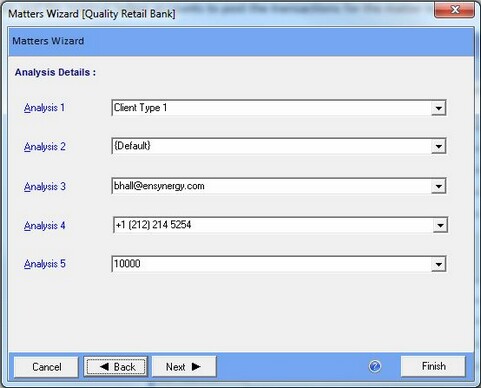
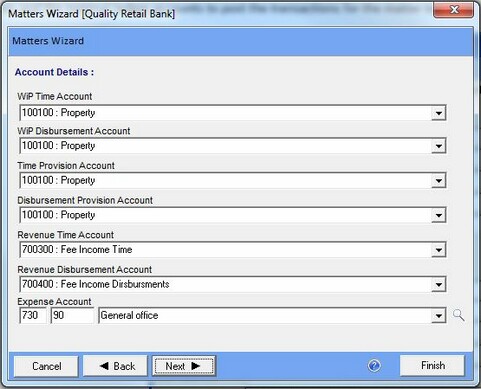
The next screen is where you can enter the start and (if necessary) the end dates of the matter:
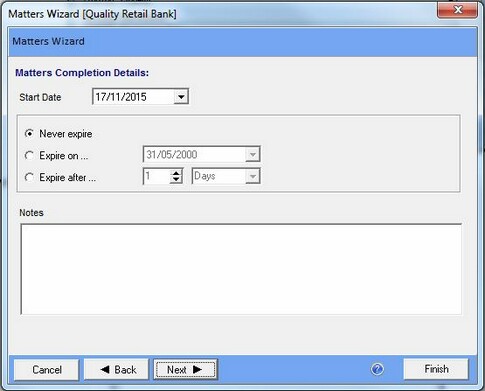
After entering the start date and end information you can click ok to finish and create the matter.
The fourth tab screen allows the assigning of Employees to the matter:-
When creating Matters / Sub-Matters it is possible to authorize individual employee and/or group of users to access that matter / sub-matter.
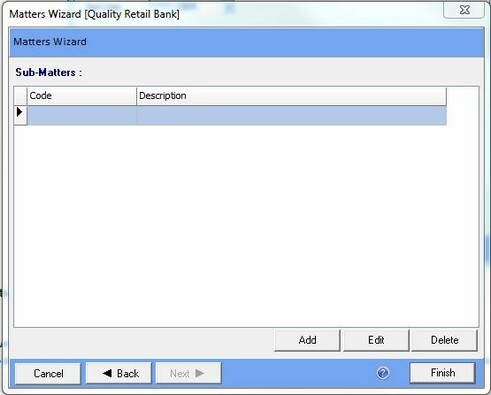
When you right click on a matter and click edit matter you will be presented with the following screen with several tabs including employees tab which is used to add or remove employees to or from the matter:
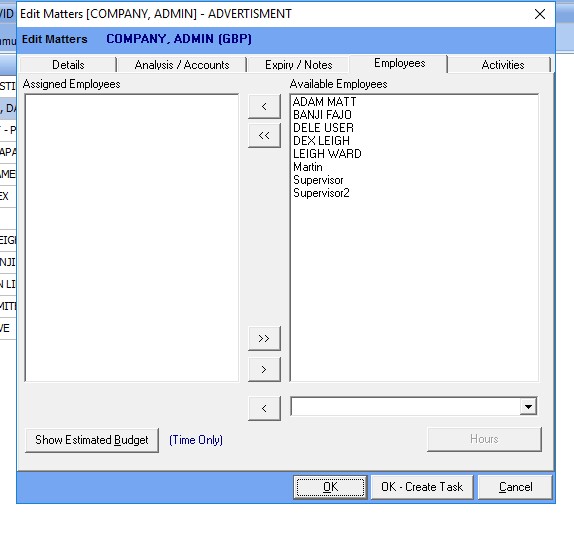
This section enables assignment of employees to matters and who has access to the matter. A matter can be added without any user assigned and all users can have access to the matter. However, once a matter get user assigned, this will lock the matter from other users and allow only the assigned user to add time and expenses for the matter in the wip journal. List of all available users will be displayed on the right side and can then be moved to the left for assignment with the button arrows as required to assign/remove appropriate user for the matter.
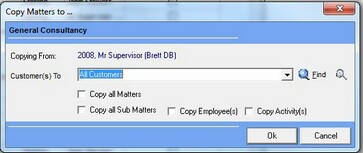
When you right click on a matter subject and select copy project you will be presented with the following screen where you can select which customer to copy the matter to. There are also options to;
| • | Copy all Matters |
| • | Copy all Sub Matters |
| • | Copy Employee(s) |
| • | Copy Activities |
To delete a matter you can select the customer, then right click on the Matter to delete and click on the delete matter option, doing this will bring up a confirmation box to prevent accidentally deleting a matter.
To add a sub matter to a matter, firstly locate the customer and the parent matter, right click on the parent matter and click add sub-matter, this will display the following screen:
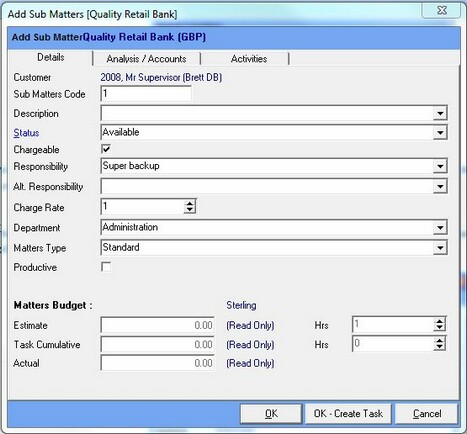
On the add sub projects screen you can enter the following information:
| • | Sub Matter Code - A unique code should be entered for identification/referencing purposes. |
| • | Description - General description or name of the matter. |
| • | Status - Available, Unavailable, Accrued or Deleted. |
| • | Responsibility - the enVisual user who is in charge of managing this matter. |
| • | Alt Responsibility - an alternative enVisual user who is in charge of managing this matter. |
| • | Chargeable - Whether or not the sub-matter will be chargeable when used for creating time. |
| • | Charge Rate - the amount that this matter is charged per unit. |
| • | Department |
| • | Matter Type |
Matter Budget Values can then be stored at the bottom of the screen.
Once this information has been entered you can either press ok to finish adding the sub matter or click on the Analysis / Accounts tab to add the analysis information in the following screen:
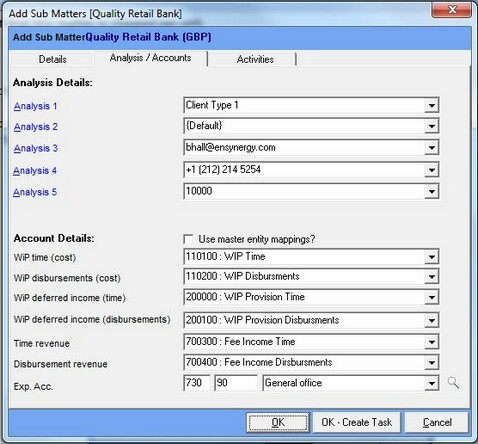
This page is used to enter information for reporting analysis.
The final page of the wizard allows the user to add activities to the sub matter.
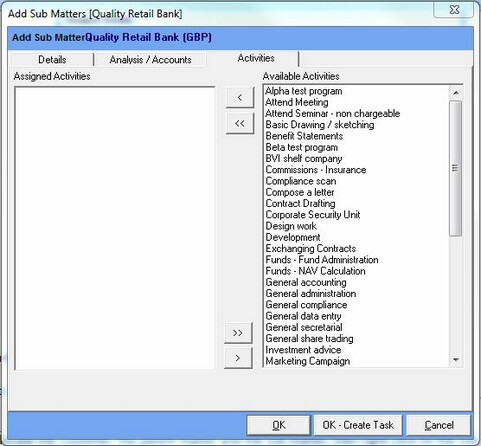
Similar to employees, here also, once activities get assigned to a matter, only the assigned activities will be displayed in wip journal when adding time for the matter.
| Edit Sub-matter |
To edit a sub matter firstly locate the customer, the parent matter and the sub matter, then right click on the sub matter and select edit sub-matter, this will display the same screens as in the above add sub matter section.

| Copy Sub-matter |
To copy a sub matter from one matter to another or from one customer to another, you can locate the sub matter you wish to copy and right click on it then select copy sub matter to be presented with the following screen:
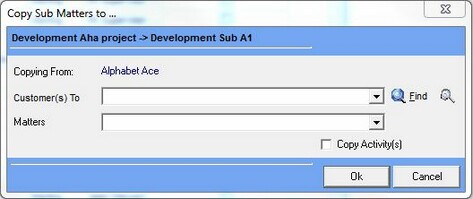
In the screen you can select the customer to copy this sub matter to, which can be the same customer as it currently is, then you can select which matter for the selected customer to copy to sub matter to. Please note you cannot copy a sub matter from one customer to be a parent matter for a different customer.
To delete a sub matter simply locate the sub matter, right click on select delete sub matter. As with deleting a matter you will be prompted with a confirmation box.