EnVisual Menu > Clients
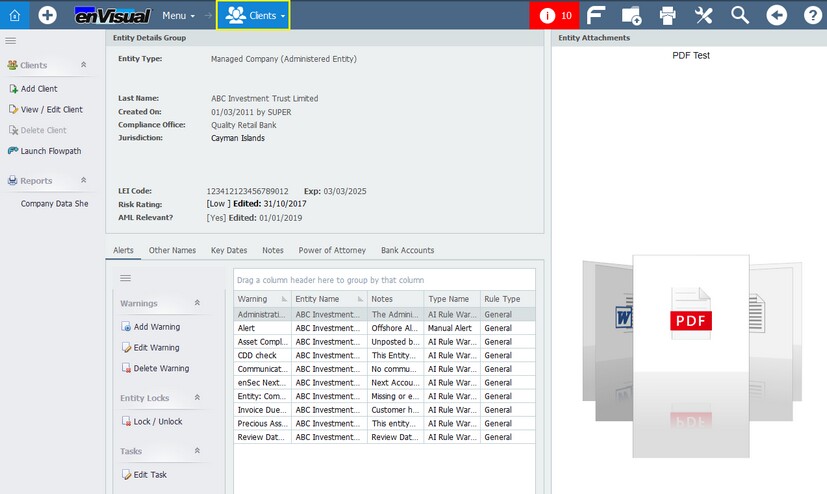
The Client section of enVisual360 contains all client details of an entity. The Clients screens itself shows all general information regarding to the entity selected. Information displayed here are: Entity Details Group, Entity Attachment, Alerts, Other Names, Key Dates and Notes. Within the client screen, user can also Add, Edit and Delete client using the available buttons on the left panel. Clicking on Add or Edit Client, will load up envisual Entity Wizard. Other options on the left side panel are Launch Flowpath and Reports. Note: When the Client menu is accessed with no entity/client selected, user will be prompted to select one.

Entity Details Group
This section displays entity information based on the entity type selected. A person entity will display the above screen while other entity types will similar to above apart from personal details related to a person entity.
Entity Attachment
This enable files and document to be attached and displayed for an entity. Simply right click in the entity attachment area and select Add, this will load up envisual – Add Attachment
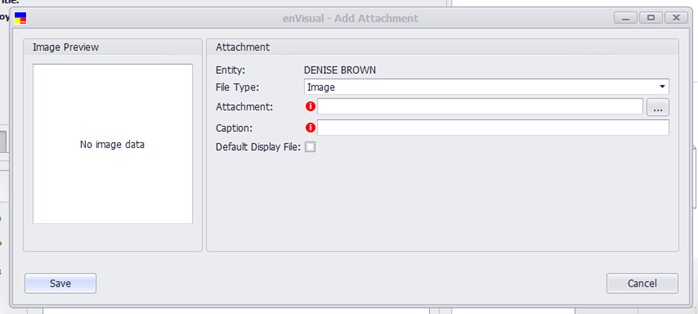
File Type: this contains the various types of files that can be added. These are: Image, PDF Document, Audio File, Word Document, SharePoint Document, Spread Sheet, Report File, Zip File, PowerPoint Document and Other File(s). The other file option can be used to attach any files and document type that is not listed in the file type.
Attachment: this will be used to add file and document into the envisual attachment. Simply press ![]() button, will load up file window to enable user locate and add the file. This field is also mandatory, the wizard will not save if and when blank.
button, will load up file window to enable user locate and add the file. This field is also mandatory, the wizard will not save if and when blank.
Caption: to be used to display any necessary or required caption for the file and document been added. This field is also mandatory, the wizard will not save if and when blank. The caption will be displayed on top of the file when viewed in the client screen.
Default Display File: tick box to be used to decide which file to be displayed first on the screen. This can also be used to arrange the sequence of display for the file and document by having multiple default display file ticked. When ticked, will display the file and document first before others.
Image Preview: this will display image preview for image files only.
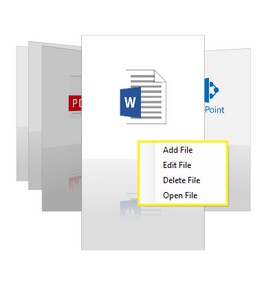
Once all the necessary field has been completed, press the save button to save the attachment which will then display in the entity attachments section. To open or view the entity attachment, this can be done either by double clicking on the file or right click > open. When multiple entity attachments are available, user can the mouse scroller to scroll between the files and documents or use the scroll bar available in the bottom of screen. To Edit entity attachment, right click on the entity attachment and then select Edit, which will then enable edit as required. When done with edit, press save to update the changes. To Delete entity attachment, right click on the entity attachment and then select Delete
Alerts and Warnings
This can be used to set up alert or warning for the entity selected.

To setup an alert or warning, press the Add button on the left panel, this will load up the warning – add wizard.
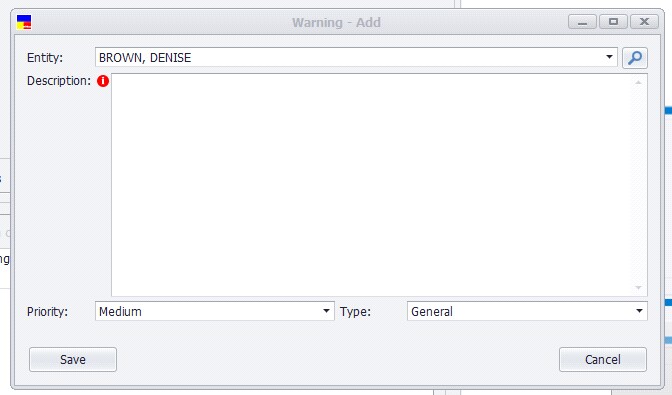
Entity: this has been defaulted to load up the entity selected, however, this can be changed as required to select another entity if necessary using the dropdown. The search button can also be used to search for the required entity by clicking on the search icon to load up the global search wizard.
Description: to be used to enter contents of the alert/warning that is been created. This field is mandatory and cannot be left blank.
Priority: to set the warning/alert priority. This can be high, medium or low.
Type: to set the warning/alert type. The dropdown will display all the warning/alert type that has been created in envisual. Currently this can be done in Ev4 > Configure > Maintenance > AI Rules > Central AI Rule Types.
Once all the necessary field have been completed, press save button to save the alert/warning, this then displays on the grid. To Edit an alert/warning, select the alert on the grid and press the edit button. This will load up warning – edit wizard. Edit the alert/warning as required, when completed, press the save button to save and update the changes. To Delete an alert/warning, select the alert on the grid and press the delete button.
Other buttons available on the left panel are:
![]() this button will become available when hover towards the left side of the panel. This can then be used to change the button view mode. Clicking on it will change the view mode as below
this button will become available when hover towards the left side of the panel. This can then be used to change the button view mode. Clicking on it will change the view mode as below
Clicking back into ![]() button, will display the below view
button, will display the below view
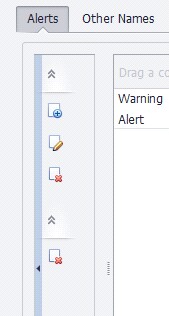
The ![]() and
and ![]() can be used to show and hide buttons on the left panels. The
can be used to show and hide buttons on the left panels. The ![]() lock button will be used to lock and unlock entity as required.
lock button will be used to lock and unlock entity as required.
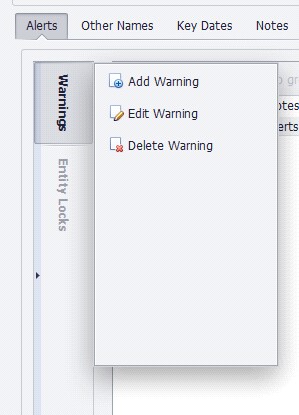
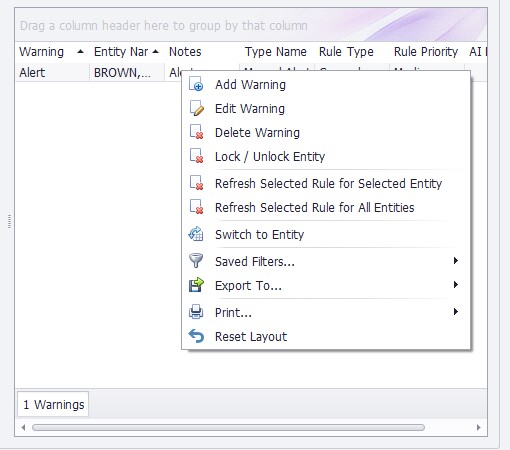
Options available in the right click menu when clicked in the alert section is shown below
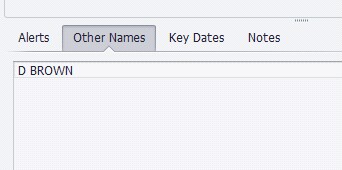
Other Names: this tab will display any other names and AKA (Also Known As) that is known to the entity. This is just view only and not editable.
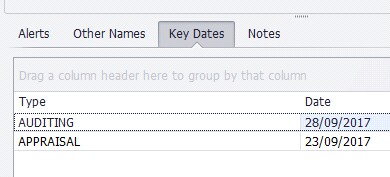
Key Dates: this tab will display all key dates that has been added for the entity. This is also view only.
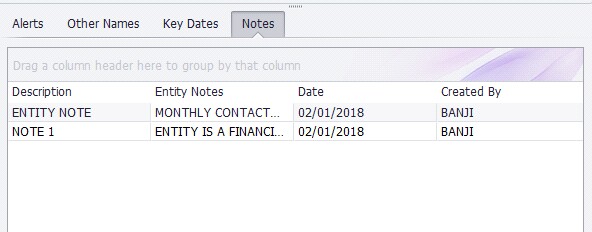
Notes: this section displays note that has been added for the entity.
LiveFile Carousel
The LiveFile carousel feature displays all published documents attached to that entity, whether the file is managed or unmanaged. This is found in the right-hand panel on the Entity Details Group screen within Clients.
By right-clicking the carousel, documents can be viewed, added, edited and removed from the list.
Add
When adding a new document to the carousel, you can select the file type, add the attachment and a caption (mandatory field). Checking the Default Display File will push the document to the front of the queue for quicker access.
Open
Opening a file from the carousel will open the original document in the intended application.
Delete
This will remove the document from LiveFile completely, not just the carousel. A warning box has been added to prevent accidental deletion.
Adding files to the carousel can also be done through Documents in the Document Details section. Once Show in Carousel has been checked, those files will then be displayed in Clients > Entity Details, same as above.
Menus found under Clients are:
| ► | Relationships – Provides information of all relationships attached to the entity. |
| ► | Communications (Comms log) – Shows a log of all communications attached to the entity. |
| ► | Tasks - Lets the user see all created tasks and processes assigned to the selected entity. |
| ► | Addresses – Provides an overview of all addresses for the current entity. |
| ► | Processes – Shows all the processes that is attached to the selected entity |
| ► | Compliance – Provides information of any attached entity compliance(s). |
| ► | Process 360 – Shows all the process templates that is attached to the entity. |
The enVisual360 Client module is known as enCentral in enVisual4.