Addresses
This section contains and hold all the addresses for an entity. An entity needs to have at least one address to enable it to save. If it doesn’t have one, a blank address is saved instead. This section can be controlled by security which can be set at Settings > Security > System Security > Clients > Addresses
![]()
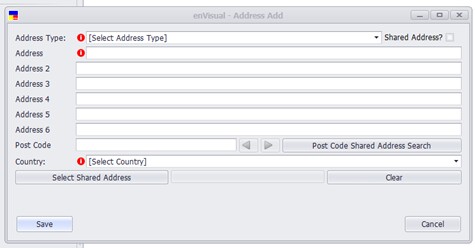
Click Add Address button on the left will display

Address Type: dropdown will contain all the address types in the system and one can be selected. During add of new entity, this has been defaulted to primary address. A primary address is required for all entities.
Shared Address: tick box will be ticked when address that is been displayed is a shared address. When ticked, the address is disabled and not editable. To edit a shared address, this has to be done in Settings > Clients > Shared Addresses.
Address: text field to enable input of address details.
Post Code: Input postal details of the address.
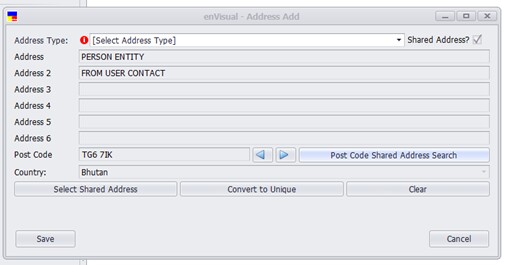
Post Code Shared Address Search: to be used to search for shared addresses that has been added in evisual 360. When clicked, will display below

The shared address tick box will be ticked, to indicate the address is share. The address fields will be greyed out and disabled. The postcode forward and back button will be enabled to allow search for the required address. Also, additional button ‘Convert to Unique’ is displayed on the address form to enable converting of a shared address to unique address.
Select Shared Address: button to be used to load up the shared address screen.

Double click on the shared address required, will load the address details in the address form. This button is similar to ‘Postcode Shared Address Search’, only different, the addresses are displayed in a list and can quickly search through them.
Clear: this button to be used to clear all the details that has been inputted in the address form. When clicked, will remove all the details inputted and clear all the fields apart form address type label.
When all necessary fields are completed, click the save button to add address on grid.

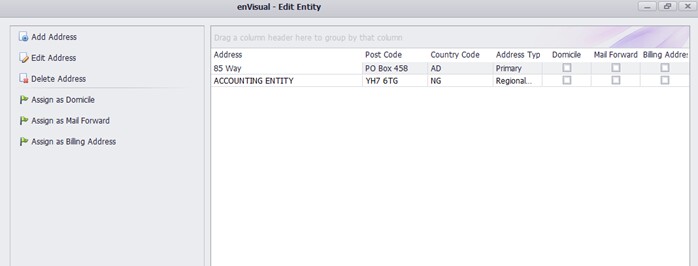
Additional address can be added clicking the add address again if required. To Edit an address, select the address on the grid and click edit address button. This will load up the address form in edit mode. To Delete an address, select the address on grid and select delete address. Warning message will be displayed, confirm action, click yes to remove address from grid.
Other options available in the address section are Domicile, Mail Forward and Billing Address.
To make an address a domicile, select the address and click Assign as Domicile on the left. This will then tick the domicile tick box on the grid. To remove domicile, select address and click Remove Domicile on the left. This will then untick the domicile tick box. A blue tooltip will be displayed to notify user when a domicile address is missing for an entity, however, as this is not mandatory for entity creation wizard, users are able to save without a domicile address.
To assign Mail Forward and Billing Address, select the address on grid and click the appropriate button on the left, Similar to domicile, this will tick the appropriate tick box on the grid and untick when removed.
All these options (Add, Edit, Delete, Domicile, Mail Forward and Billing) are also available in the right click options.