Entity Details
The following sections are available for most enVisual360 Entity Details apart from Third Parties Entities.
| ► | Names |
| ► | AKA |
| ► | Entity Mappings |
| ► | Addresses |
| ► | Tax Residencies |
| ► | Relationships |
| ► | Categories |
| ► | Security |
| ► | Communications |
| ► | Key Dates |
| ► | Notes |
Names
This section is used to maintain Entity Details name as required. The section will populate based on the Entity Type selected.
![]()
AKA
This section can be used to add also known as names for an entity. This section can be controlled by security which can be set at Settings > Security > System Security > Clients > AKAs
![]()
Clicking the Add Aka will display below:

Input the also known as name and click save will add and display the name on grid. To Edit, select the AKA on the grid and select Edit Aka, will load edit mode, edit as required and click save when finished. This will update the grid. To Delete, select the AKA on the grid and select Delete Aka, warning message will be displayed to confirm action, click yes will remove the aka from grid. The Add, Edit and Delete options are also available in the right click menu.
Entity Mappings
This section is used to map Entity within enVisual360 as required. Security for this is maintained at Settings > Security > System Security > System Mapping > Entity Mapping. Entity Mappings can also be maintained via Maintenance.
![]()
Addresses
This section contains and hold all the addresses for an entity. An entity needs to have at least one address to enable it to save. If it doesn’t have one, a blank address is saved instead. This section can be controlled by security which can be set at Settings > Security > System Security > Clients > Addresses
![]()
Click Add Address button on the left will display
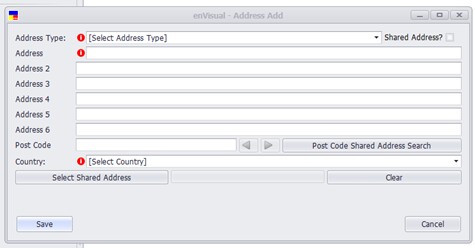
Address Type: dropdown will contain all the address types in the system and one can be selected. During add of new entity, this has been defaulted to primary address. A primary address is required for all entities.
Shared Address: tick box will be ticked when address that is been displayed is a shared address. When ticked, the address is disabled and not editable. To edit a shared address, this has to be done in Settings > Clients > Shared Addresses.
Address: text field to enable input of address details.
Post Code: Input postal details of the address.
Post Code Shared Address Search: to be used to search for shared addresses that has been added in evisual 360. When clicked, will display below
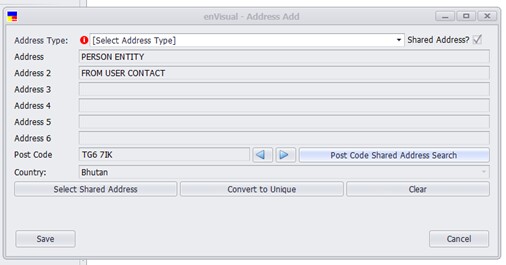
The shared address tick box will be ticked, to indicate the address is share. The address fields will be greyed out and disabled. The postcode forward and back button will be enabled to allow search for the required address. Also, additional button ‘Convert to Unique’ is displayed on the address form to enable converting of a shared address to unique address.
Select Shared Address: button to be used to load up the shared address screen.
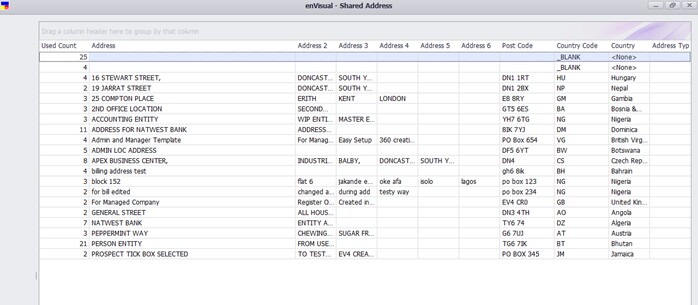
Double click on the shared address required, will load the address details in the address form. This button is similar to ‘Postcode Shared Address Search’, only different, the addresses are displayed in a list and can quickly search through them.
Clear: this button to be used to clear all the details that has been inputted in the address form. When clicked, will remove all the details inputted and clear all the fields apart form address type label.
When all necessary fields are completed, click the save button to add address on grid.
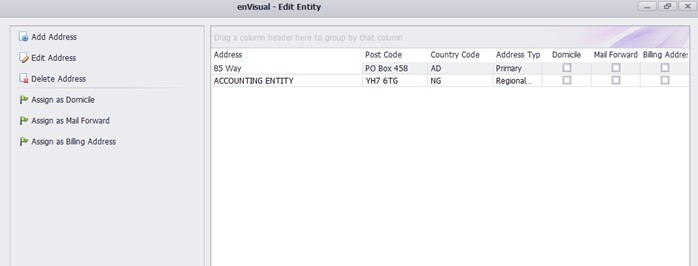
Additional address can be added clicking the add address again if required. To Edit an address, select the address on the grid and click edit address button. This will load up the address form in edit mode. To Delete an address, select the address on grid and select delete address. Warning message will be displayed, confirm action, click yes to remove address from grid.
Other options available in the address section are Domicile, Mail Forward and Billing Address.
To make an address a domicile, select the address and click Assign as Domicile on the left. This will then tick the domicile tick box on the grid. To remove domicile, select address and click Remove Domicile on the left. This will then untick the domicile tick box. A blue tooltip will be displayed to notify user when a domicile address is missing for an entity, however, as this is not mandatory for entity creation wizard, users are able to save without a domicile address.
To assign Mail Forward and Billing Address, select the address on grid and click the appropriate button on the left, Similar to domicile, this will tick the appropriate tick box on the grid and untick when removed.
All these options (Add, Edit, Delete, Domicile, Mail Forward and Billing) are also available in the right click options.
Tax Residency
This section is used to manage Tax Residencies for entities within enVisual360. The tax residency of an entity can be assigned/ unassigned using the Entity Wizard > Tax Residency. These can be added by highlighting and double-clicking the country or by using the arrow buttons.
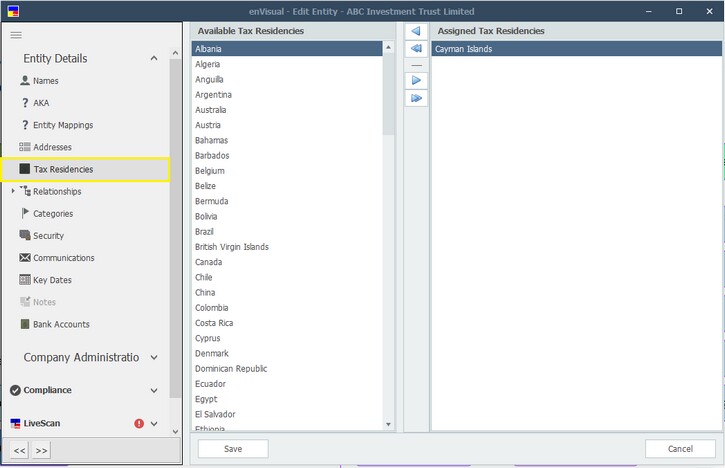
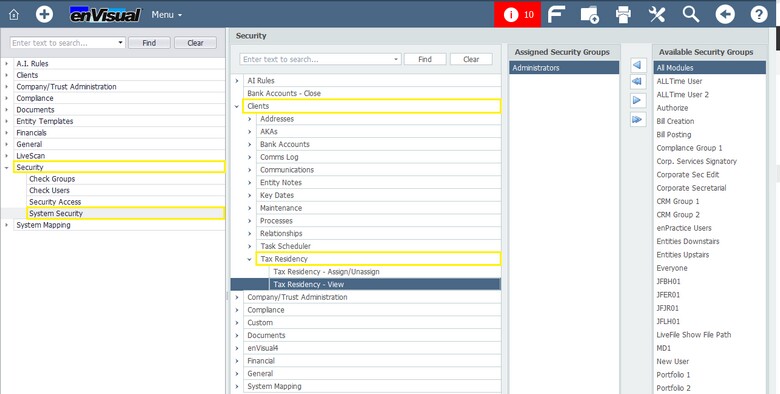
Security for this feature is available in Security > System Security > Clients > Tax Residency. This section allows authorised users to assign users/ user groups to the following security groups:
Tax Residency - Assign/ Unassign
Adding users to this group will allow them to assign and remove tax residencies on entities within the Entity Wizard.
Tax Residency - View
Users within the View group can only view the tax residencies of entities and do not have access to modify or remove them.
After a country has been added to the security group, a confirmation message will appear at the bottom of the screen.

Relationships
This section contains and displays entity relationships. These are Primary, Secondary, Other Relationships, External Directorship and Power of Attorney. This section can be controlled by security which can be set at Settings > Security > System Security > Clients > Relationships
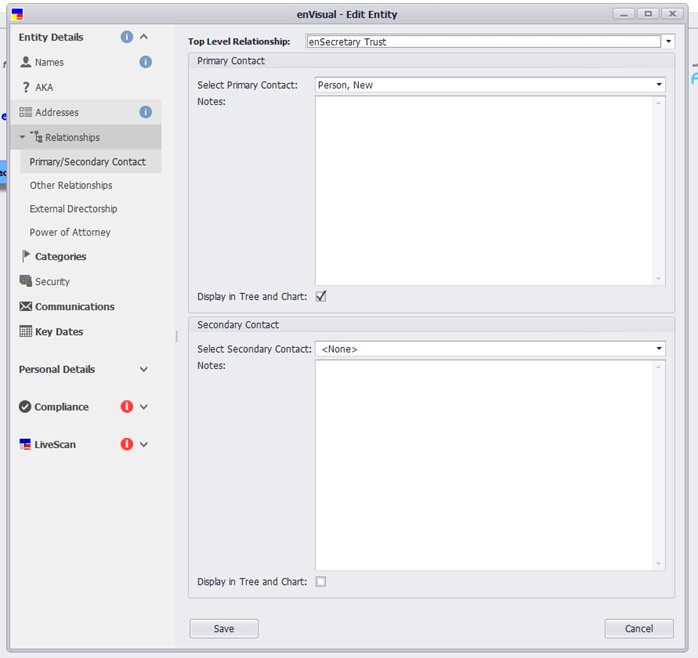
The top section displays the primary contact which can be selected from the dropdown list and any note can be inputted in the notes section while the bottom section displays the secondary contact. Display in tree and chart tick box to be used if the entity is to be displayed in relationship tree and organisation chart. When ticked means the relationship will be displayed and when unticked, the relationship will not display.
Others types of relationships are displayed in the Other Relationship sections as shown below
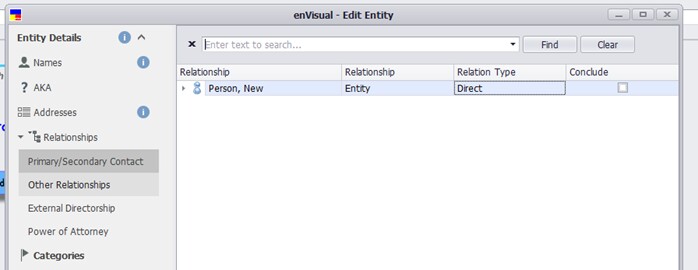
The screen above functions exactly to enVisual Menu > Clients > Relationship.
Categories
This section displays all the system categories which can then be assigned as required to for the entity.
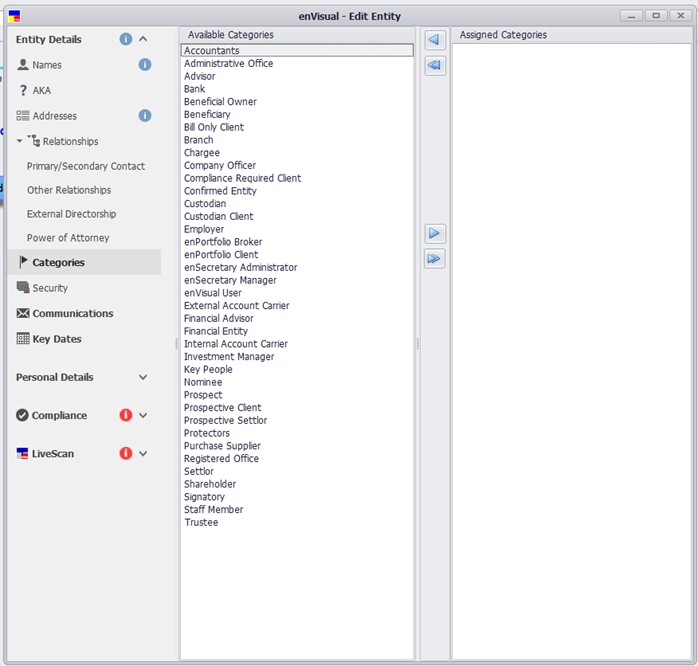
These categories will enable the entity to act as such at the relevant screens in enVisual 360. The left side shows all the available categories that can be assigned and pushed to the right to show in the assigned categories section. The forward and back buttons are to be used in moving categories left and right. The double buttons are to be used when all the categories are to be moved from one side to another in on go.
Security
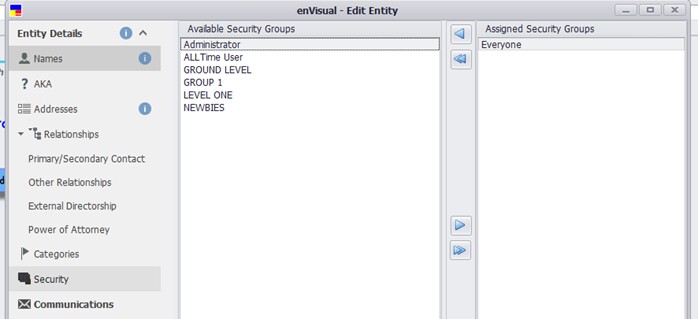
This section displays security group which can then be assigned as required for the entity. It shows what security group will have access to the entity using the left and right buttons. The button functions same as in category.
Communications
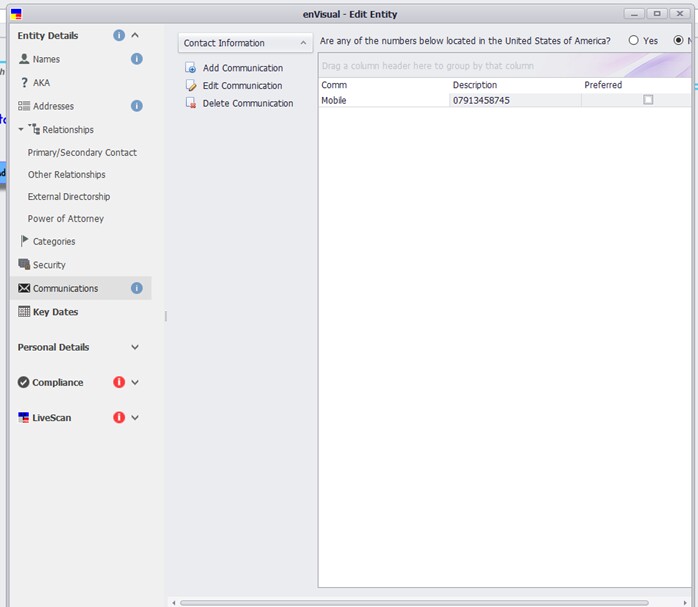
This section displays the communication details for the entity. Here means of communication for the entity can be viewed and added. The option ‘Are any of the numbers below located in the United States of America’ can be used to indicate and signify when a contact for the entity is located in country mentioned. This section can be controlled by security which can be set at Settings > Security > System Security > Clients > Communications
Click Add Communication will display

All communication types will be found in the Comm Type dropdown. Description to be used to input text and digits depending on the communication type selected. Eg email communication type will be email, mobile will be numbers etc. Preferred tick box to be used to select which comm type is preferred for the entity for contact. Click save, when finished which will add the comm type.

To Edit a comm, simply select the com and select Edit Communication, which will load up the edit comm form. To Delete a comm, select the comm and click Delete Communication, warning will be displayed, confirm clicking yes will delete the selected communication.
Key Dates
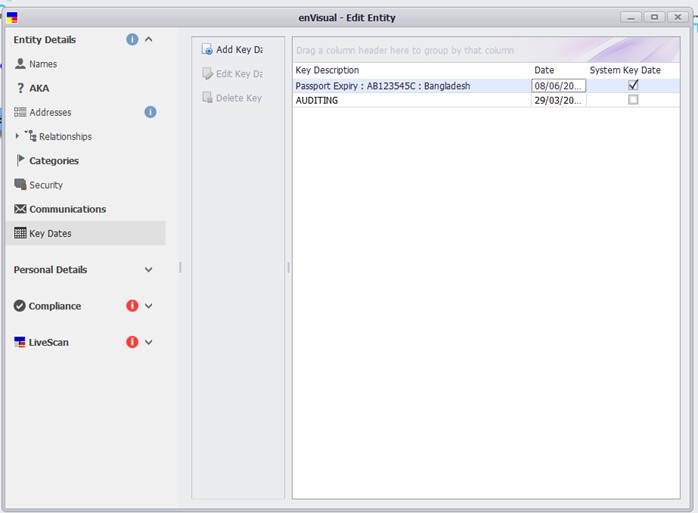
This section contains any relevant key dates that has been added for the entity. There are 2 different types of key dates that are displayed here, system generated ones and manually created ones. A system generated key dates are not editable. example of these are passport expiry and enscretary dates. Only manual added key dates are editable. When a system generated key date is selected on the grid, the edit and delete key date options are disabled with the system key date tick box ticked. A manual key date type can configured at Settings > Clients > Key Date Types. This section can be controlled by security which can be set at Settings > Security > System Security > Clients > Key Dates
Click Add Key Date will display

Select the key date type from the dropdown and date required using the date dropdown. Click save when finish will ad the key date onto the grid. Click Edit Key Date will open the form in an edit mode with details already filled in, while Delete Key Date will delete the key date from grid.
Notes
This section enable the ability input relevant note for envisual entities as required. Security for this section is available at Settings > Security > System Security > Clients > Entity Notes
![]()
Bank Accounts
This section contains Banking information for enVisual360 Entities. Security for this section is available at Settings > Security > System Security > Clients > Bank Accounts. Further details available at Banking section
![]()