Entity Grid Right Click Menu
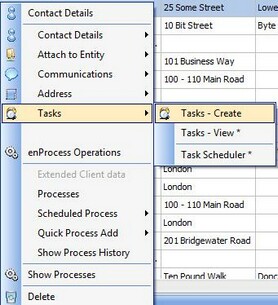
The Entity Grid Right Click Menu is when you right click on an entity from within the entity grid. This right click menu differs depending on the entity that is right clicked upon. When right clicking on a trust this menu will display trust details in addition to the standard right click options, right clicking on a customer will show customer details. As entities can be more than one type, for example a trust can also be a customer, this menu will display all the relevant menu items.
![]()
The right click menu is split up into a few different sections, each section has several sub menus or option, the first section is 'Entity Details'.
Entity Details Section
Entity Details is the first section on the right click menu and consists of several sub menus that can be used to manage different aspects of an entity.
Within the Entity Details sub menu there are several options that enable the user to manage information relating to the entity.
The first two options on the entity details sub menu are add entity and edit entity, these items are discussed in their relative sections in this help file.
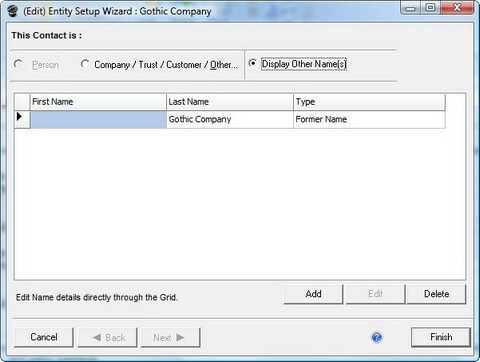
The former/other names option is used if an entity has previously changed their name for some reason, or uses an alias. An example of this is if an entity gets married, then their maiden name will be recorded in this way. This screen is available on the add entity wizard.
The External Directorship option can be used to set a different entity as external director of the selected entity.
The Other Data option is used to enter any notes about the entity that don't fit into any other section. Other Data can be entered in the add entity wizard.
The Create Template based on Details option can be used to create an entity template from the selected entity. Entity templates are explained in the entity templates section of this help file.
The Set as Funds(Company) and Set as Funds(Trust) options are used to setup the fund information for the selected entity.
The Add to Branch option is used to add the selected entity to a branch. Branches are discussed in more detail in the Branches section. |
Details of the Company Details sub menu can be found on the Company page |
Details of the Trust Details sub menu can be found on the Trust page |
Details of the Customer Details sub menu can be found on the Customer page |
Details of the Billing Entity Details sub menu can be found on the Billing Entity page |
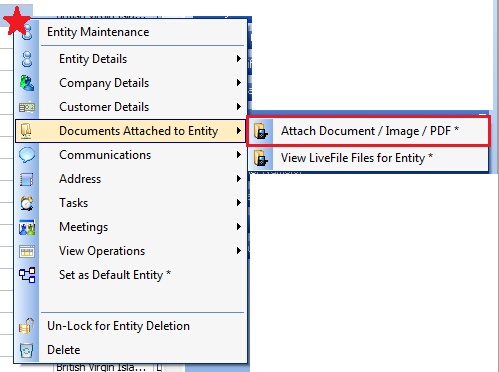
The Documents Attached to Entity sub menu can be used to add a few different items to an entity. The items that can be added to an entity are documents, images, PDF's and LiveFile files. To attach either a document, an image or a pdf, the user can select the required entity and then right click, select attach to entity and then click attach document/ image/ PDF.
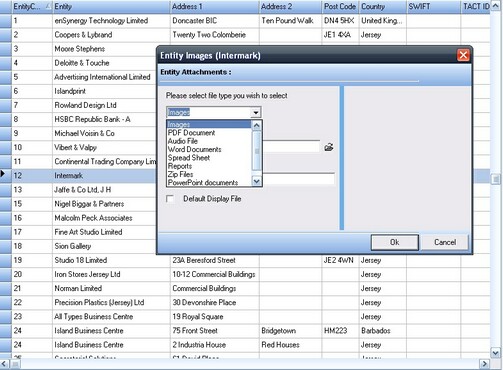
After selecting attach document/image/PDF, the below screen will be displayed. This Screen will enable the user to select which type of file to attach to the entity from a drop down list.
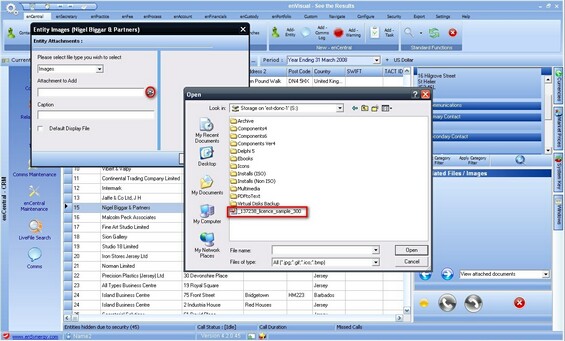
After selecting the file type the user will need to select the file to add, this can be done by clicking the folder icon which will display the standard windows file browser window. The user can browse to and select the file to attach using this window.
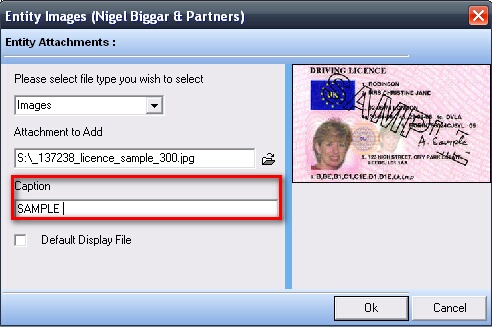
Once the file to attach has been selected, the use will need to enter a caption for this file, this could be the name of the attachment and is how the system refers to this attachment.
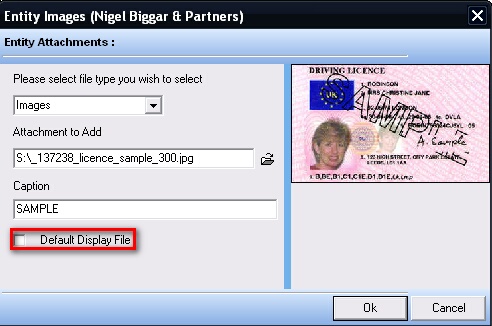
The Default Display File option marks if this file is the file that is displayed in the right hand panel in the entities grid when this entity is selected. This is necessary as more than one document can be added to a entity, so the system needs to know which file to show a preview of.
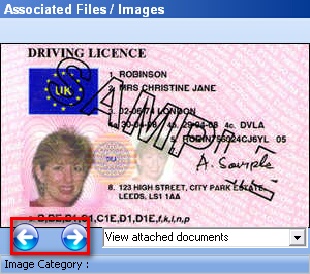
Once all the required information has been entered the user can complete this screen by clicking the ok button. Once the page has refreshed the attached file type can be seen in the bottom right hand corner of the screen. If the entity has more than one document then the user can click the arrows under the preview to see all the other attached files in turn.
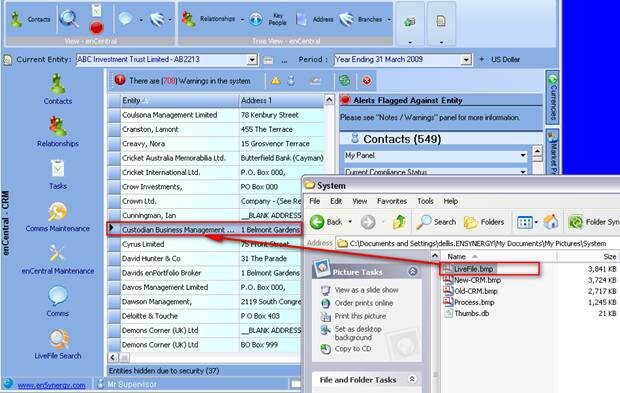
An Alternative way of attaching a document is to open the document in window browser and drag and drop the document into enVisual on to the entity the user wish to attach the document. and example of this is shown below.
Note: A file attached in this was is stored within the normal system and DOES NOT add the file into LiveFile |
|
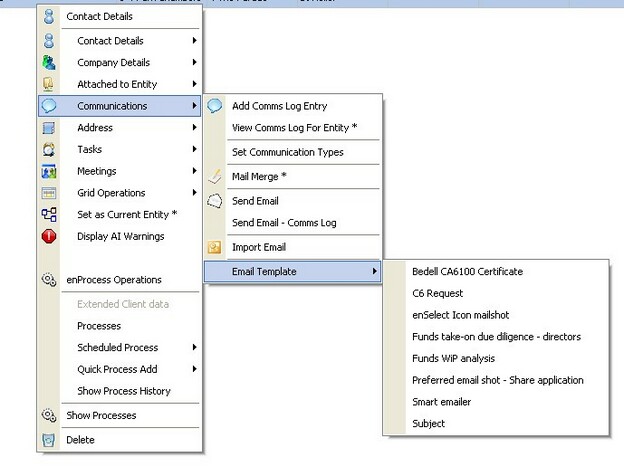
The communications sub menu contains various options related to managing communications for the selected entity.
The Add Comms Log Entry Option is simply a way of keeping track of all the conversations the user has with the selected entity. The Comms Log section has more information about this.
The Set Communication Type option is used to add other ways of contacting the entity. The Creating an Entity chapter has more information.
The Send E-mail option is used to send an e-mail to a entity. The Send E-mail - Comms Log option is used to send an E-mail to entities that have been previously emailed.
Integrate Outlook simply opens Outlook Express so the user can send an E-mail to this entity.
The email template option has a sub menu of its own, this can be used to select email templates, so that the user doesn't have to retype an email for every entity.
|
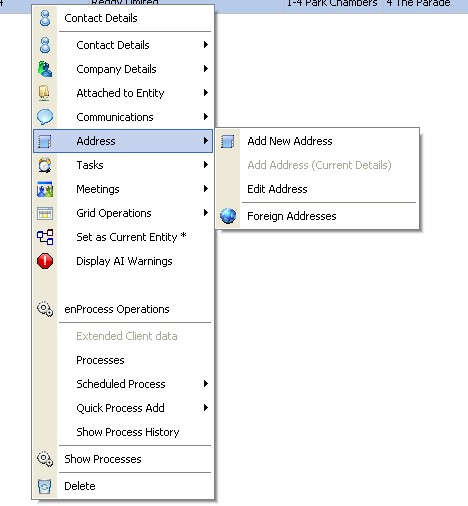
The Address Sub Menu can be used edit an address or add a new address to a entity.
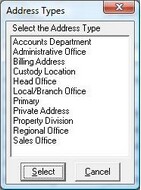
Clicking the Add New Address option opens up a window where the user can select the address type.
From this screen the user can select the address type to add and click select. Doing this will display a new window where the user can enter the new address details.
Clicking the Edit Address option from the Address Sub Menu will display an edit address screen to the user where all the current address details are displayed for the user, these details can then be edited. |
The Tasks Sub Menu is used to create or view tasks in the system.
The Tasks - Create option in the tasks sub menu can be used to create a new task against the selected entity. Tasks details can be viewed in the Tasks section. |
The enProcess Operations section of the right click menu is discussed in the enProcess section of this help file. |
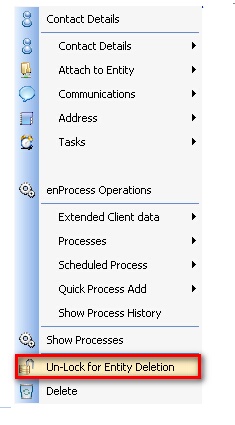
This is the option where the user can unlock an entity to delete them. In the system the user may use a entity more than once so they won't delete them. However if the user does want to delete a entity, click the Un-Lock for Entity Deletion option and then the Delete option.
|
