This is the homepage of enVisual 360 where user can navigate to various modules and sections of the application.
The home page screen is defaults to My Shortcuts, My Tasks, My Communications and My Portal Messages.
![]()
The homepage will display with entity selected and display none if none is selected. User can also rearrange the homepage icons as desired. This can be done by dragging the icons around as desired. The following are found on the homepage:
![]()
This is found at the top right side of the home screen. The search bar links to the GES (Global Entity Search) and enable user to search for an entity in the system. The red X button can be used to clear any current entity selected, while the blue + button when clicked on, will open enVisual flowpath. User will have to type in the search box, press enter or click the search icon to load up the GES wizard and then double click on the entity searched for to load and display the entity.

To search for an entity, simply type in any parts of the entity to display a search result. Extra columns options available that can be added onto the grid using tick boxes are: Include AKA, Include System and Include Comms Log. When ticked, will add and display the column on the grid and when unticked, will not display the column. Additional information can be displayed on the grid using the Filter Right Click Menu > Column Chooser. More about grid filters can be found in Filters.
![]()
This home button which can be found on the menu bar, will return any active screen to ev360 homepage. This button can be used when a quick return to home page screen is required. This has been default to display My Shortcuts on homepage when pressed.
![]()
Pressing the envisual menu will enable user navigate to the available sections or area of the entity/client selected. This will expand depending on the available option available for the entity/client selected. This has been default to: Clients, Documents, Dashboard, Alltime and Fund Management by default if no entity or client is selected. With a client/entity selected, the options under 'Menu' will vary depending on the type of client or entity selected, alternatively when selecting 'Clients' within 'Menu' without any entity selected, such a choice will be prompted to the user before the screen progresses.
The other options on the right hand side are as follows (from left to right);
![]()
| • | Ai Warnings / Alerts |
| • | FlowPath Navigation |
| • | Import / Export |
| • | Air Reports |
| • | Settings |
| • | Back |
| • | Help |
Ai Warnings / Alerts
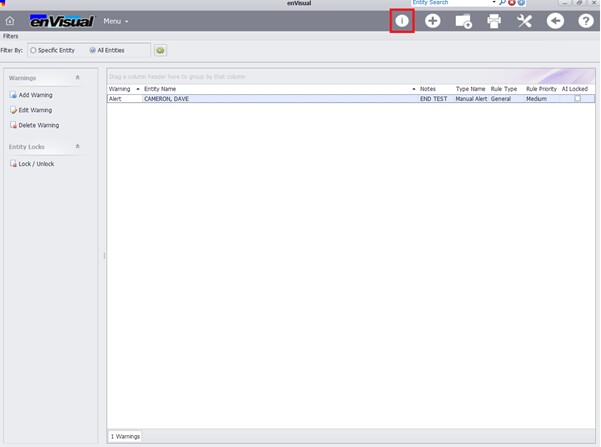
Ai Warnings / Alerts can be used as a reminder to remind duties or processes that are required for entities. This button when clicked, will display a screen with alerts and warning for entities. Alerts and warning are notifications that can be added for entities when information or details are missing. The alert and warning screen can be filtered by two ways which are: Specific Entity and All Entities. New warning and alerts can also be added, edited and deleted at this screen using the the buttons available on the left panel.
To add an alert / warning, click the Add Warning to load up enVisual warning add wizard
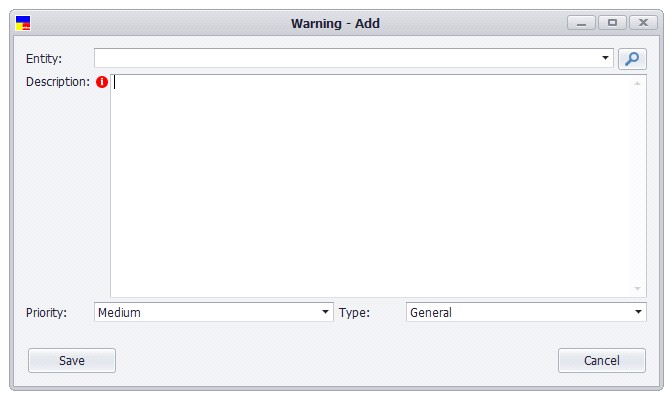
Entity: Select the entity the warning is for. The dropdown will contain all entities that has been added into enVisual.
Description: Input a description for the warning that is been added.
Priority: what priority level is the warning. This can any from Low, Medium and High.
Type: what type of warning is being added. This can be custom added at Configure > Maintenance > Ai Rules > Central Ai Rule Types.
Click save when all fields are completed. This will then add and display the warning on grid.
To edit an alert / warning. Select the warning and click edit button, which will load up enVisual edit warning. Edit the warning as required and press save when done. This will then change and update the alert on grid. To Delete a warning, select the warning and click delete button.
The Entity Locks option can also be used to lock a warning from other users without access or permission editing the warning. The access / permission can be found at Settings > Security > System Security > enVisual4 > Security System > Entity Locks > Access Locked Entities. With the right access and permission, to Lock a warning, select the warning on the grid and click on Lock/Unlock button, to lock the warning from editing and to unlock, simply select the warning and click lock/unlock again. All these options are also available in the right click options: Add, Edit, Delete warning, Lock/Unlock, Refresh Selected Rule for Selected Entity / All Entities.
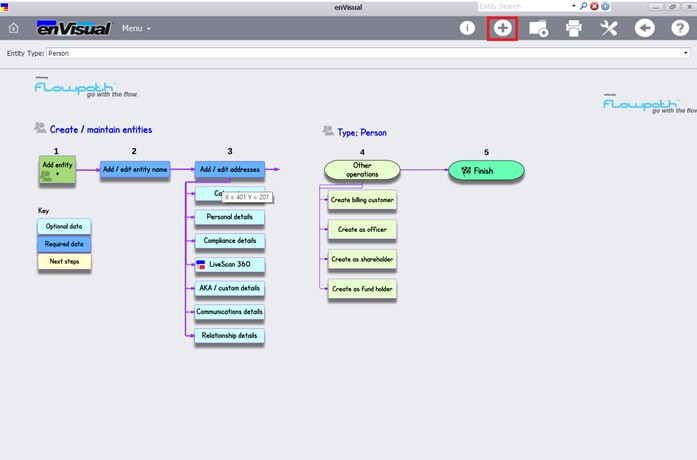
Flowpath Navigation.
Flow path navigation is a directory and guidance on how to reach certain areas of enVisual. Flowpath is currently divided into 4 areas which are:
| • | CRM – for adding and editing entities. |
| • | Administration – for certificate of incumbency |
| • | Accounting – for accounting processes |
| • | Funds – for funds management. |
Import / Export
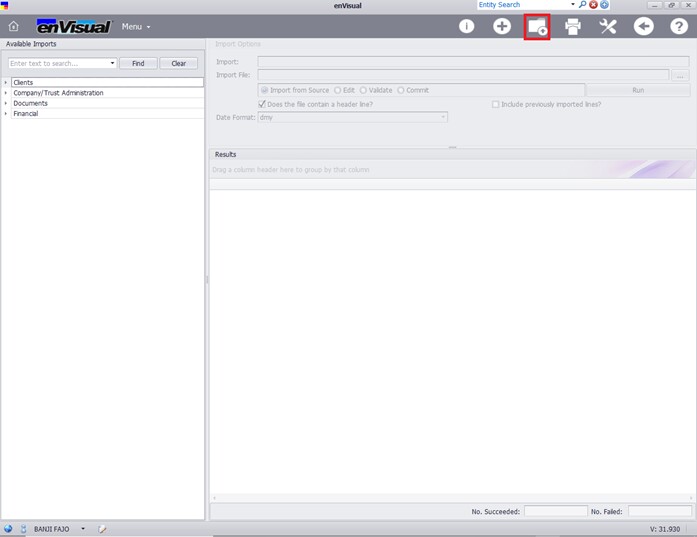
This section is used to import and export files and document in and out of enVisual 360. This feature also include APE (Automated Procedure Engine) which is a powerful tool designed to simplify and automate the running of custom procedures.
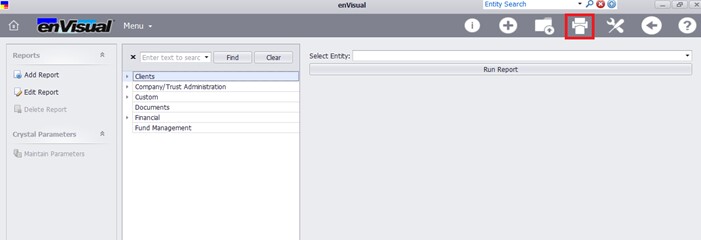
Air Reports
This section is used to add and edit custom report that has been added into enVisual 360.
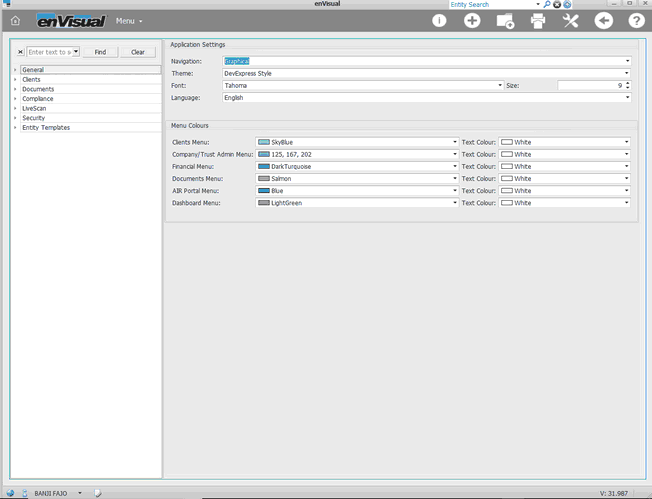
Settings
This section contains enVisaul360 module maintenance. Various module of enVisual360 are configured here. Detailed information about settings can be found in Settings.
Other buttons available are:
![]() - back button to reverts the application back to the last viewed screen.
- back button to reverts the application back to the last viewed screen.
![]() - allows the viewing of a configured help file. user canb use this to access the help file for enVisual 360 application.
- allows the viewing of a configured help file. user canb use this to access the help file for enVisual 360 application.
HOMEPAGE SHORTCUTS

The home page screen is defaults to My Shortcuts, My Tasks, My Communications and My Portal Messages.
The bottom section of the homepage screen displays the following:

![]() - Link to enSynergy website
- Link to enSynergy website
![]() - To be used when user needs to be changed or switched. User have the option of using this button or log out and then log back in.
- To be used when user needs to be changed or switched. User have the option of using this button or log out and then log back in.
![]() - This displays what user is signed on to the application
- This displays what user is signed on to the application
![]() - Can be used to view and change groups.
- Can be used to view and change groups.
![]() - Can be used to view and modify licence.
- Can be used to view and modify licence.
![]() - displays what connection is been connected and can also be used to change or switch between connections by clicking on it. At all time, the version and database number should always match, i.e be the same. However, when the software version is different from the database, the section bar will be displayed in red to notify user of a miss match connection between the software version and database version. This
- displays what connection is been connected and can also be used to change or switch between connections by clicking on it. At all time, the version and database number should always match, i.e be the same. However, when the software version is different from the database, the section bar will be displayed in red to notify user of a miss match connection between the software version and database version. This  will be displayed on envisual 4 while 360 will display
 ![]() to flag up and notify user about the mismatch.
to flag up and notify user about the mismatch.