Once time and/or expenses have been submitted/approved, authorised users are able to post them into the enVisual Work in Progress (WiP) grid for the corresponding customer and Master Entity.
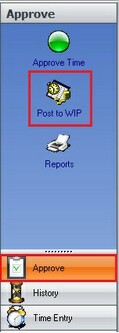
This can be accomplished by navigating to the 'Approve' tab of ALLtime and selecting 'Post to WiP' on the left hand panel as shown below.

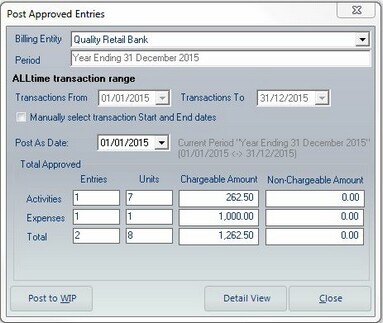
The subsequent screen allows for specific (or all) lines to be posted into the WiP Grid and will look similar to the following;

Billing Entity - Select the Master Entity that you wish to see time/expense entries for, the 'Total Approved' section will update to reflect the selection.
Period - Shows the currently operated (selected) financial period.
Transaction Range - Automatically populates with the Period date range. Users can tick the box to over-ride this and select a manual date range.
Post As Date - The date that the selected entries will be posted on/as.
Total Approved - This section displays all entries that are currently available for posting.
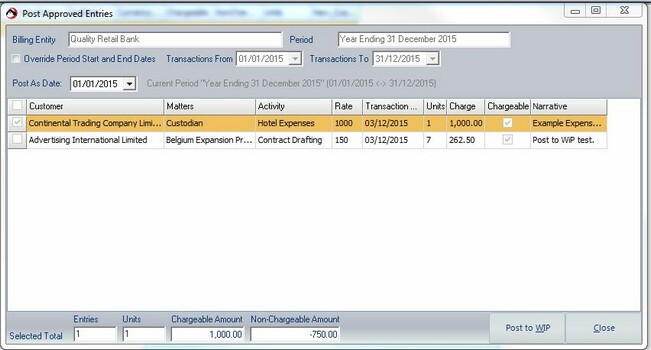
Selecting the 'Post to WiP' button in this screen will automatically post all entries available (deduced by the 'Total' field). Alternatively, users can view a list of the individual entries and select which ones they wish to post by selecting the 'Detailed View' button.

Selecting an entry in here will tick a box on the far left - which denotes that the entry will be posted. Users can selecting multiple entries by using ctrl+click. Once all required entries are selecting for posting, use the 'Post to WiP' button to finalise.
See Work in Progress for information on viewing posted time and expense entries.