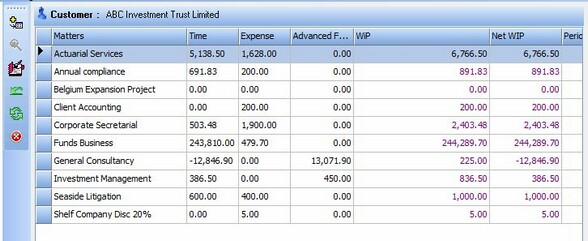
It is possible to double click on a customer in the WiP Grid to drill down into the specific time and expense information for the selected customer.
Below is an example of a top level drill down;
The drill down proceeds through the following levels in order;
| • | Projects (Matters) - Displays the list of Projects for the customer (shown in the above screenshot) and all relevant time/expense information in the period for that Project. |
| • | Activities/Expenses - Displays the 'Activity' and 'Expense' accounts for the selected Project. |
| • | Time/Expenses - This is separate to the above, and gives a detailed list of the postings to the account selected. Whilst the above refers to the Expense account, this drill down area will display the expense itself. |
The drill down screens also contain a number of right click menu options as explained below.
Available at all levels is the following option(s).
The transfer option can be used to move a WiP item from one place to another, when you click this option you will be presented with the below screen:
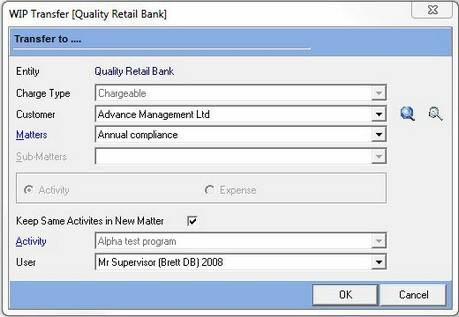
To transfer WiP enter the information as detailed below and then click the ok button to finalize the transfer.
| • | Charge Type - this is if the WiP is chargeable or non - chargeable for the new customer |
| • | Customer - WiP can be transferred to a different customer if required, simply select the destination customer in this drop down list. |
| • | Project - similar to with customers, WiP can be transfer between projects, simply the destination project from this drop down list. |
| • | Sub Project - if the selected project has sub projects then they will be listed here for you to select from. |
| • | Time/ Expense options - this is depending on the WiP item that you select and can't be changed. |
| • | Time/Expense - dependant on the WiP item selected this will display a list of time activities or expenses, from this list you can select which activity or expense to transfer this WiP to. |
| • | User - this is the user responsible for carrying out the work after the WiP has been transferred. |
At the Time/Expense display level, the following right click options become available.
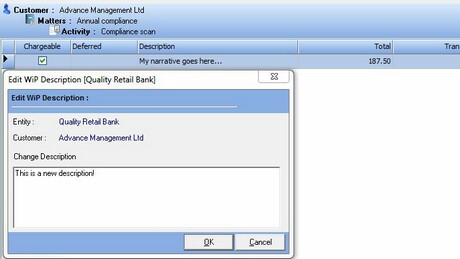
Edit Transaction
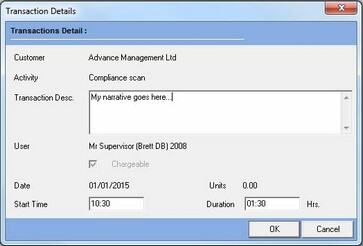
This option allows the user to edit the Description field of the Time/Expense entry. The edit form is displayed below.
This option can be used to decrease the amount of the WiP item, to use this option simply enter the amount to decrease the WiP by (the amount to write off) and then click the ok button. The Write Off screen is shown below:
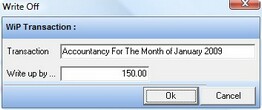
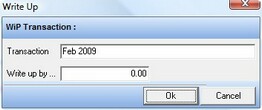
This option can be used to increase the amount of the WiP item, to use this option simply enter the amount to increase the WiP by (the amount to write up) and then click the ok button. The Write Up screen is shown below:
Show Details
This option displays the complete information of the Time/Expense entry. The form is read only.
Defer WiP
The Defer WiP option is used to postpone work on the selected WiP item until a later date, the defer WiP screen is show below:
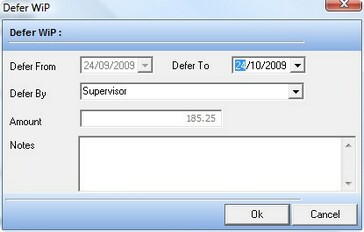
To defer WiP, fill in all the information as detailed below and press Ok.
| • | Defer From - This is auto populated as today's date. |
| • | Defer To - This is the date you wish to postpone the WiP item until. |
| • | Defer By - This is the user that postponed the WiP. |
| • | Amount - This is auto populated to the amount of the WiP item. |
| • | Notes - Any notes you wish to enter on the reason for postponing this WiP item. |