Credit Notes

Top  Previous  Next

The enFee module is used to generate invoices or bills for customer based upon work that has been carried out, at times customers may be charged or pay too much or you may just want to give them a refund. This is where you can issue them with a credit note


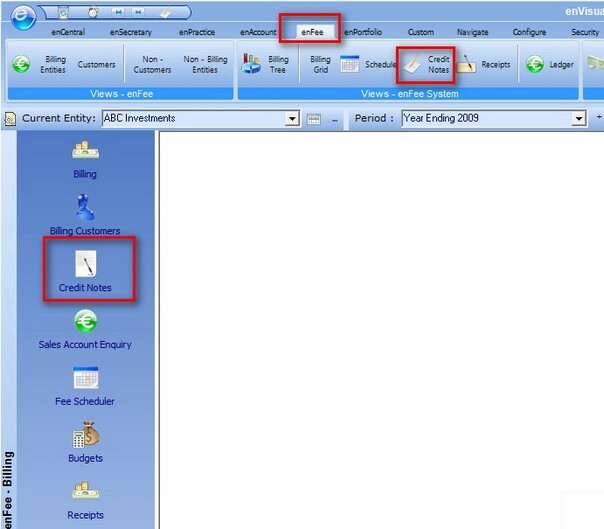
To access the Credit Notes grid the user can simply open the enFee tab in enVisual and click on the Credit Notes button on the modbar or the navbar as shown below:
 

enFee_CreditNotes_Load


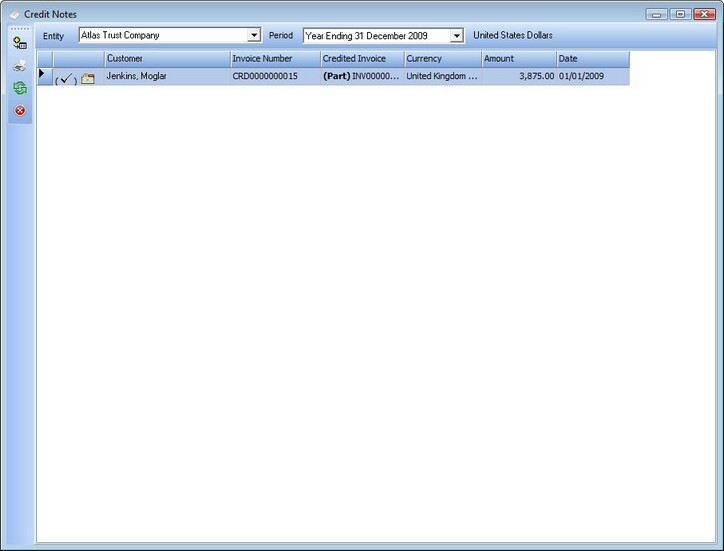
When the Credit Notes grid launches you are presented with the screen shown below:
 

enFee_CreditNotes_Grid


The Credit Notes grid has the standard entity selection list and period list at the top of the grid so that you can easily select a different entity or period to use for Credit Notes.


The standard control buttons are available on the left side the the Credit Notes grid, these control buttons are detailed below:


hmtoggle_arrow1Add Credit Note

Pressing the Add Credit Note button will present you with two options, these options are completely different therefore are detailed separately below:


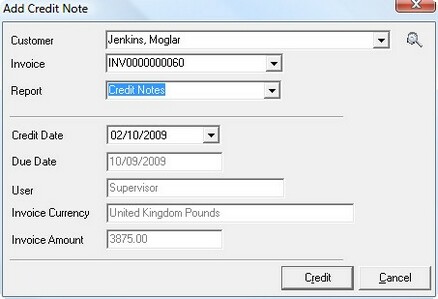
Selecting the Credit an Existing Fee option is used to totally credit an invoice for the full amount, if an invoice has been partially paid then the Create a Partial Credit Note option should be used. Selecting the Credit an Existing Fee option will display the following screen:


enFee_CreditNotes_CreditExisting


On this screen there are four pieces of information to fill in before you can click the Credit button to create the credit note. The information to be filled in is shown below:


Customer - this is the name of the customer that the credit note is being created for.

Invoice - this is the invoice number that the credit notes is being created to pay off.

Report - this is which credit note report layout is to be associated with this credit note, this is used when printing or previewing the completed credit note.

Credit Date - this is that date that the credit note is created on.


Once all of this information has been added you can click the Credit button to create the Credit Note.


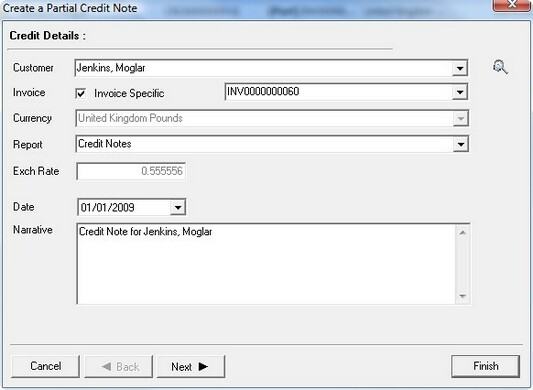
Selecting the Create a Partial Credit Note is used if an invoice has been partially paid off, but the remaining balance needs to be credited, also if a client needs to be refunded for some reason, this can also be created as a partial credit note. Selecting the Create a Partial Credit Note option will display the screen below:


enFee_CreditNotes_CreatePartial1


To complete this screen you will need to enter the following information:


Customer - this is the customer that the credit note is being created for.

Invoice Specific - if you would like to create the credit note to credit an invoice check this option and then select the invoice in the drop down list, if you only wish to credit the customer uncheck this option.

Currency - when creating an invoice specific credit note, this option is set to the currency of the invoice and cannot be changed, however if you create a non-invoice specific credit note you can select the currency to create the credit note in.

Report - this is which credit note report layout is to be associated with this credit note, this is used when printing or previewing the completed credit note.

Exch Rate - this is the exchange rate that the credit note is to be created with, if you are creating an invoice specific credit note, this option will be locked to the same exchange rate as the invoice.

Date - this is the date that the credit note is being created on.

Narrative - the narrative or description will be used to identify the credit note, this is auto generated when items on the screen are filled in, but can be overwritten.


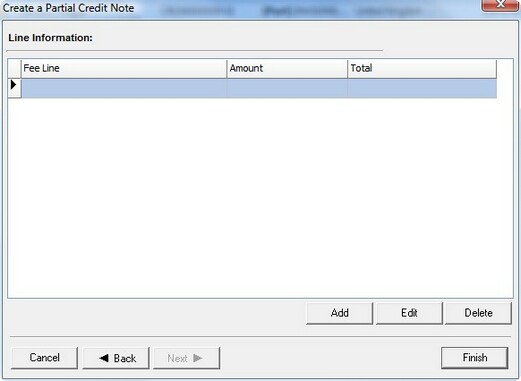
Once all of this information has been entered you can click next to go to the next stage of creating a partial credit note. The next screen will change dependant on the invoice selected if creating an invoice specific credit note. If you are creating a partial credit note for an invoice with multiple fee lines you will see a different screen to when creating a non-invoice specific credit note or a single invoice specific credit note. When crediting a multi line invoice you will see the below screen. When creating a single line credit note you will see that you can skip this screenshot.


enFee_CreditNotes_CreatePartial2


The above screen will simply list all the credit note lines that you add to the credit note. To Add or Edit a credit note line press the appropriate button and you will be prompted with the below screen.


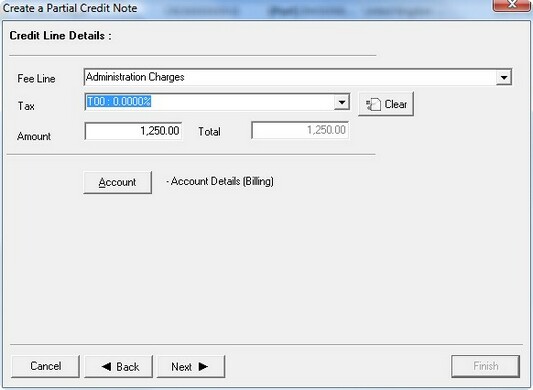
If you create a credit note for a single lined invoice or if you create a non-invoice specific credit note you will also see the below screen.


enFee_CreditNotes_CreatePartial3


On this screen you can select the following information:


Fee Line - this is the invoice line type that the credit note is being applied to, for more information on fee lines see enFee Maintenance

Tax - this is the tax type that is to be applied to the credit note, for more information on tax type see enFee Maintenance

Amount - the amount field is used to enter the amount that the credit note is to be created for.

Total - this is the total amount for the credit note including any tax amounts.

Account - this is the account in the nominal ledger that the credit note is to be posted to.


If you are crediting a multi line invoice you can click the next button to add the current credit note line to the credit note.

If you are crediting a single line invoice or creating a non-invoice specific credit note you can now click the finish button to create the credit note.


hmtoggle_arrow1Print Details

Clicking on the print details button will present you with a menu where you can print or preview the selected credit note using the default credit note report, or preview the selected credit note using any non default credit note.


hmtoggle_arrow1Refresh Data

This will simply reload the information in the grid to make sure that all the latest information is available.


hmtoggle_arrow1Exit

This will close the Credit Notes grid


The main Credit Notes workspace lists all the credit notes that have been created for the selected billing entity and period, the details that are shown for credit notes are shown below:


Customer - this is the name of the customer that the credit note has been created for

Invoice Number - Credit notes are special invoices that post a negative value rather than a positive value, therefore a credit note still required an invoice number, this invoice number will be prefixed with the letters CRD to distinguish between standard invoices and credit notes.

Credit Invoice - if this credit note has been created to credit an invoice, the invoice number will be displayed here.

Currency - this is the currency that the credit note was created in.

Amount - this is the total amount that the credit note has been created for.

Date - this is the date the credit note was created.


There are four right click options available in the credit notes grid, these are shown below


Edit Credit Note

This option is used to change some of the details of a credit note before it is posted. The same screens are used as shown within the Add Credit Note page


Post Credit Note

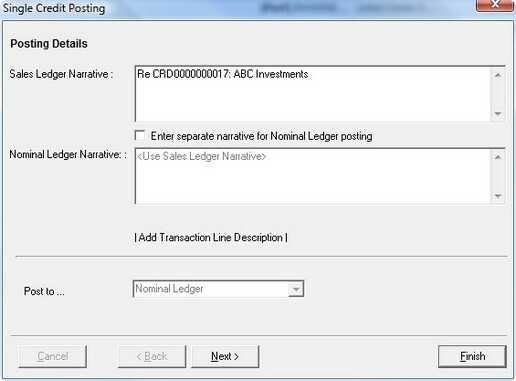
This option is used to post the credit note to the sales and nominal ledgers, pressing this option will display the following screen:
 

enFee_CreditNotes_Post


On this screen you can simply enter the narratives that the credit note will be posted with and press finish.


Delete Credit Note

This option is used to delete an un-required credit note, credit notes can only be deleted before they have been posted.


Reverse Credit Note

This option is used to reverse a credit note that has been incorrectly posted, unlike with other reversals, reversing credit notes will actually reverse all ledger postings and then delete the credit note. If you need to repost the credit note you will have to totally recreate and report it.