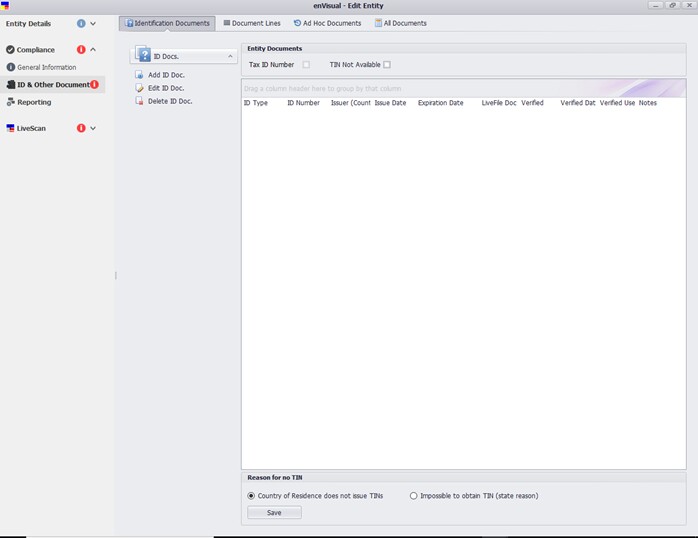
2. ID & Other Document
This tab stores and displays compliance information such as Identification documents, Other documents and Additional documents. This section can be controlled by security which can be set at Settings > Security > System Security > Compliance > Documents & Lines. Additional information can be displayed on the grid using the Filter Right Click Menu > Column Chooser. More about grid filters can be found in Filters.
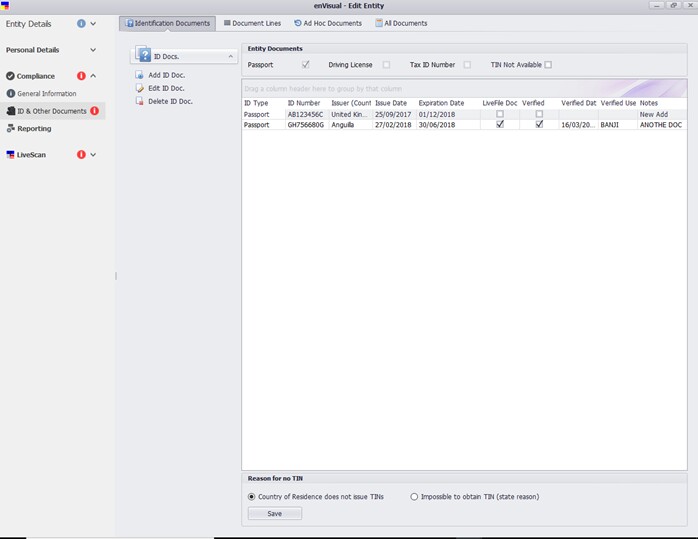
2.1 Identification Documents: This is the first tab displayed in id and document section. This tab stores documents such as passport, driving license and tax id number. When any of such documents are added, this will be indicated with the relevant tick box ticked. All of the tick boxes are disabled apart from the ‘Tin Not Available’. When ticked, will remove the ‘Reason for no TIN’ option displayed in bottom of screen.
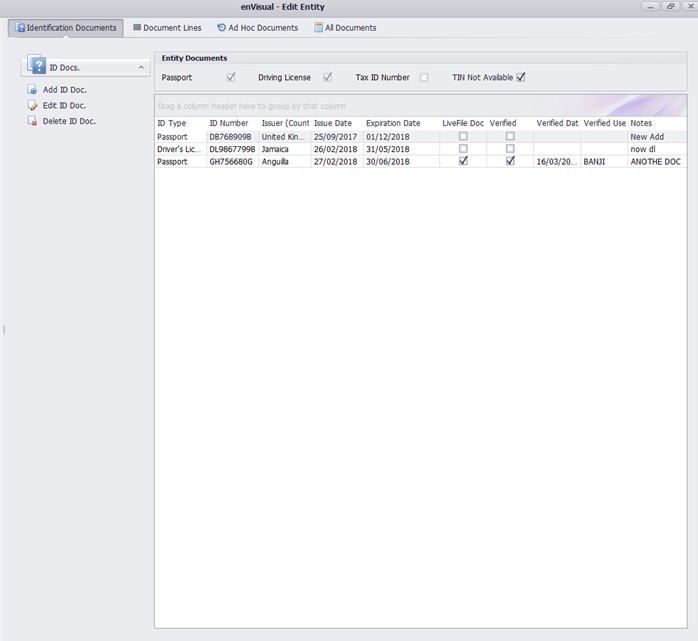
With the ‘TIN Not Available’ option unticked and the ‘Reason for no TIN’ displayed below the screen, this can then be used to input any reason why the tax identification number is not available. This option has been defaulted to ‘Country of Residence does not issue TINs. However, this can be edited as required. Tick ‘Impossible to obtain TIN (State Reason)’ will add and display a text field section which will enable notes to be inputted.
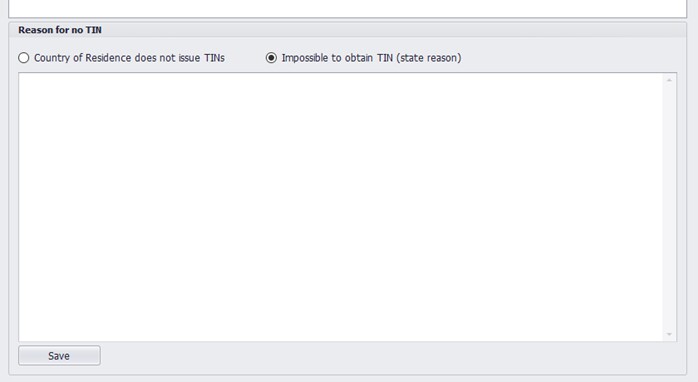
Click save when finish will save the details. However, the ‘Reason for no Tin’ section will be removed from the screen once a Tax ID Number has been added
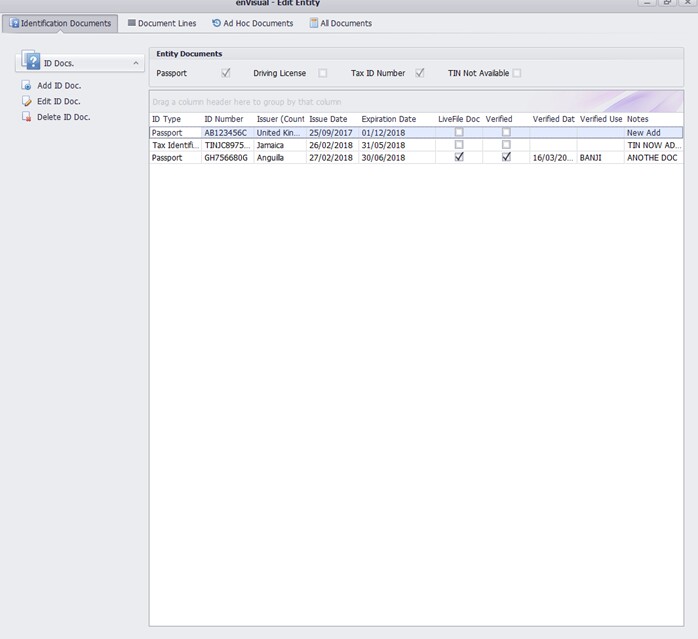
Click Add ID Doc button on the left panel will display the form below with the Document Review tab missing which is only available during edit.
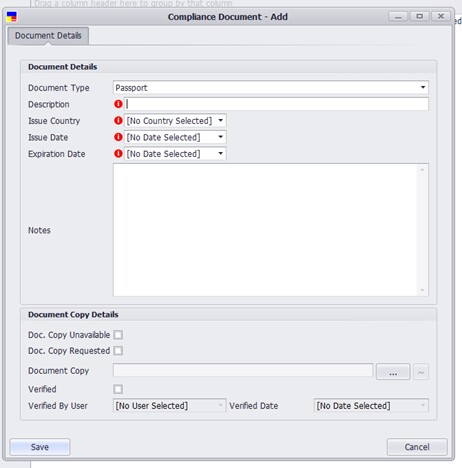
Document Details: this section consists of document details and document copy details.
Document Type: the dropdown contains all the document types that can be added. Select the required document type here. Note, only Passport, Driving Licence and Tax Identification documents will be displayed in this screen. Any other document type selected here, will be added and displayed at the relevant screen for the document selected.
Description: input description for the document type selected
Issue Country: select the issue country of the compliance document
Issue Date and Expiration Date: select issue and expiration date of the document
Notes: input any relevant notes required
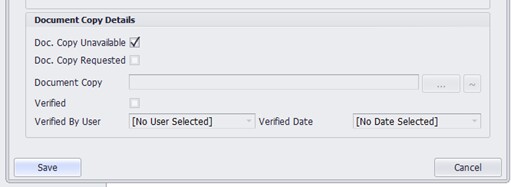
Document copy Details: this section to be used to notify and indicate if the document copy is available or not. Tick the ‘Doc. Copy Unavailable’ tick box will disable ‘Doc. Copy Requested’ and ‘Document Copy’ fields. Untick the tick box, will enable the fields again. Tick
Tick the ‘Doc Copy Requested’ will add three fields to the form. Date Requested, Date Received and Received Notes.
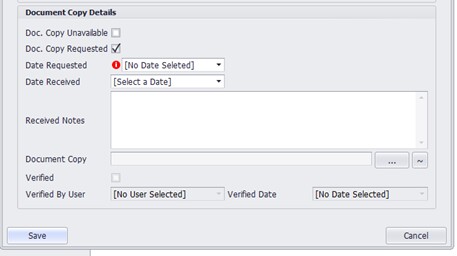
The date requested field will be mandatory once the doc copy requested is ticked. Date requested to be used to select what date the compliance document was requested. Date received for when was it received and received notes for any relevant notes required.
Document Copy: will display the document attached for the compliance document. Click …. Button will load up enVisual LiveFile documents below
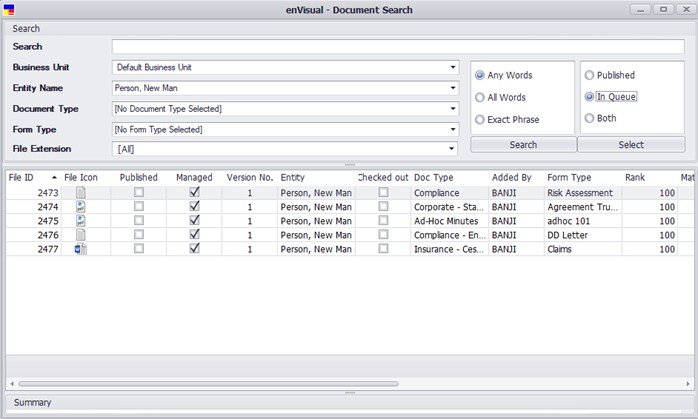
Search for the document needed and click select button (which is also available in right click option). This will then display the file in document copy field. To view the document, click the ~ view button.
Verified: tick box to be used if the compliance document added has been verified or not. This tick box is controlled by security. When user has no security, the tick box will be disabled, but will security, the tick box will be enabled. The security can be set at Settings > Security > System Security > Compliance > Compliance Documents > Document Lines > Verify. When the verified tick box is ticked, the document copy field will become mandatory. The verified by user and verified date will be prepopulated with logged in user and current date. However, these fields are editable as required.
Once all these fields have been completed, click the save button will add the compliance document onto the grid.

Click Edit ID Doc button on the left will display the compliance document edit form with the document review tab available which is set with security at Settings > Security > System Security > Compliance > Compliance Document > Document & Lines > Review. With no security, the tab will be displayed in a greyed out disabled mode.
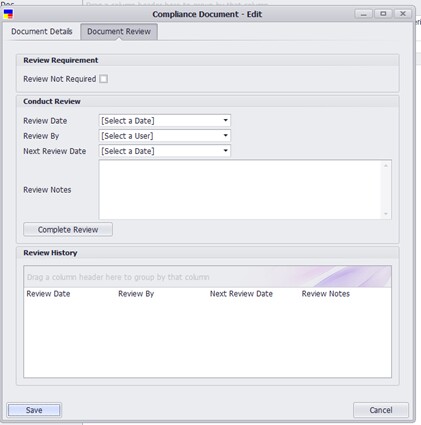
Review Requirement: section to be used to indicate if review is required for the compliance document or not. Tick ‘Review Not Required’ tick box will indicate that review is not required for the compliance document and the conduct review and review history sections will be disabled on the form.
Conduct Review: when enabled, will allow a review date, review by and next review date to be set for the compliance document. Any relevant details or information can be inputted using the review notes section.
The Complete Review button is used when the conduct review section has been completed. Click complete review will display the details in the review history section as shown below.
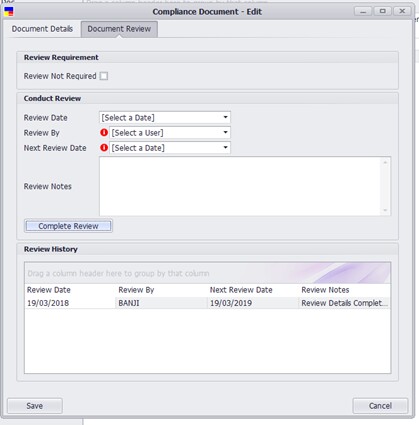
Once finish editing, click the save button to update the changes and display on grid.
Click Delete ID Doc will delete the compliance document selected on the grid.
The Add, Edit and Delete options are also available in right click menus with additional options of View Id Document for viewing attached documents.
2.2 Document Lines: this section is used to add compliance document templates that has been created in Settings > Compliance > Compliance Document Templates. The template dropdown will display all templates headers attached to the entity type selected and the document lines attached to the header will be displayed in the screen.
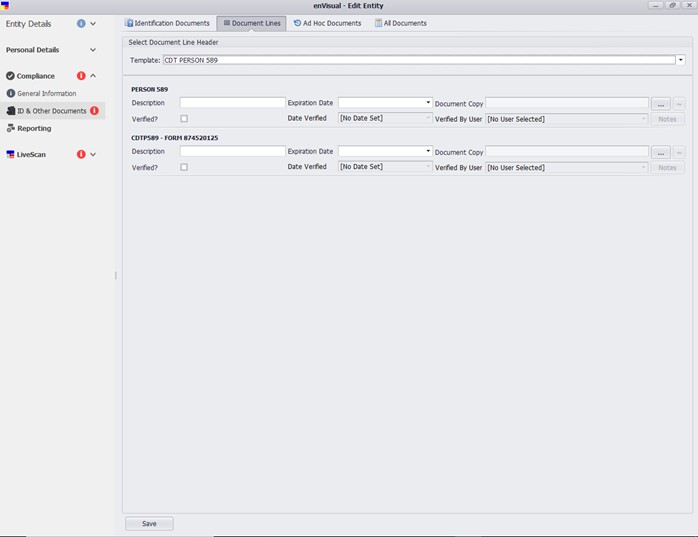
Each document line displayed will have its own section to be completed which are:
Description: to be used to input any description for the document line
Expiration date: select expired date for the document added.
Document copy: to enable the attachment of document copy from LiveFile. Click …. will load up LiveFile and enable document to be searched for and ~ button to view the attached document.
Verified tick box to be used if the form has been verified or not. Once ticked will enable the date verified and verified by user fields, which will be prepopulated with current date and logged in user. However, these can be edited as required. (More about attaching document has been discussed earlier in identification document tab. The same also process applies here.)
Notes: when clicked will open the document compliance in edit form. Extra information for the document line can then be completed.
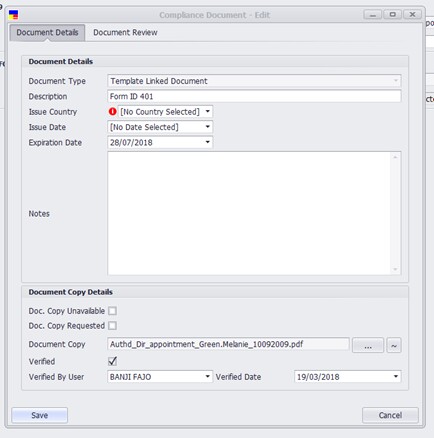
In the edit mode, the Issue Country is mandatory and will need to be completed for the form to save. Click save will update the form and display below
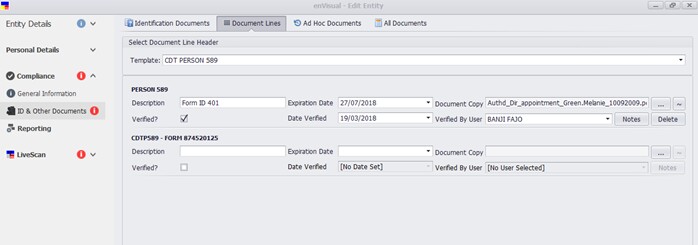
The delete button is used to delete a document line that is no longer required.
An expired document line text will be displayed and highlighted in red with a blue i next to the expiration date field to notify that this document has expired.
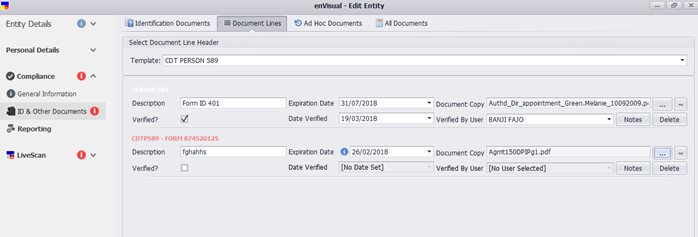
Once all the required document lines has been completed, click save button at the bottom of the screen before navigating away from the tab to confirm any changes.
2.3 Ad Hoc Documents: this section is similar to identification document, it enables the adding of custom document type created in Settings > Compliance > Compliance Document Types. Such document types are displayed in this tab.

Click Add Ad Hoc button on the left will display compliance document add form.
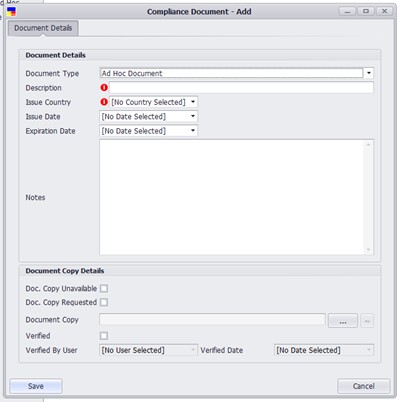
The form displayed is the same form for the identification documents. Select the Ad Hoc document from the document type dropdown in the form. Complete other relevant information as required and click save when finish. This will save and display the form on grid.
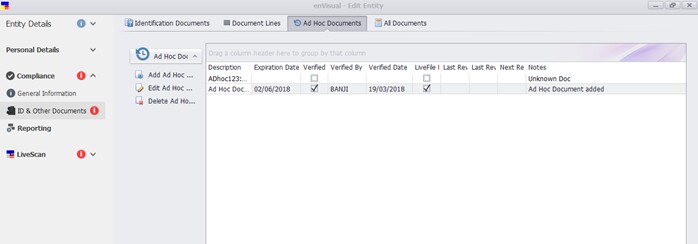
Click Edit Ad Hoc will open Compliance Document – Edit. Edit the form as required and click save when completed to update the changes. Click Delete Ad Hoc will delete the ad hoc document from grid. Add, Edit and Delete options are also available in the right click menu including View Doc.
2.4 All Documents: this tab displays all the compliance documents that has been added for each of the 3 different tabs.
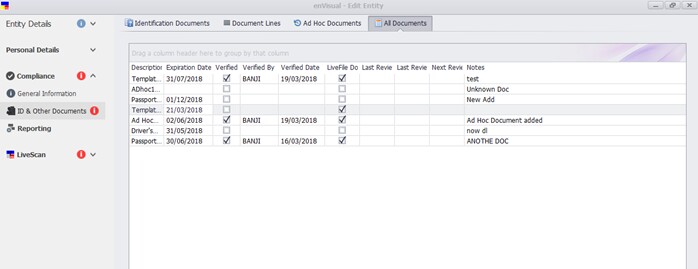
This tab is for view only and no compliance documents can be edited within this tab. To edit any compliance document, this has to be done at the respective tab.
To update with below or wholse section itself
Compliance: An other type compliance screen looks below
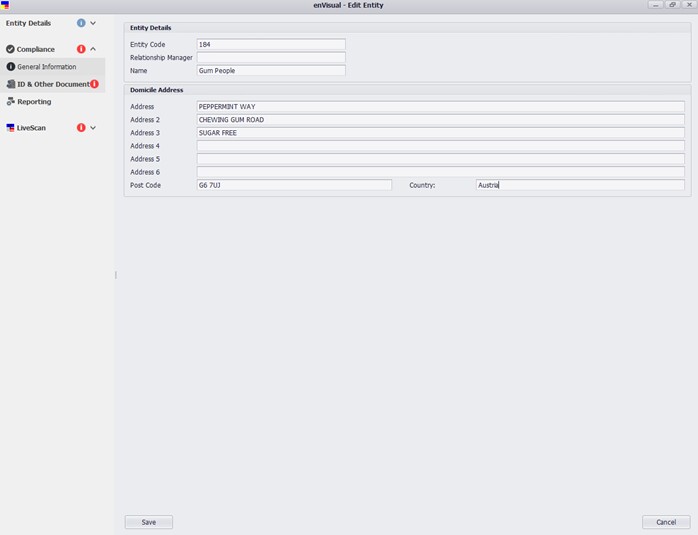
The general information displays entity details and domicile address for the entity. The entity code is auto generated by the system, while a relationship manager can be selected at relationships. The domicile address can set at addresses. Only Tax ID Number and Ad Hoc Documents can be added for other entity types in identification documents tab.
