The Supplier Recovery (also known as the RoR Grid) grid is used for viewing and maintaining invoiced lines that have been configured for Return on Receipt (RoR) transactions.
RoR is a management mechanism to hold off paying an invoice when they are awaiting payment from a 3rd party first.
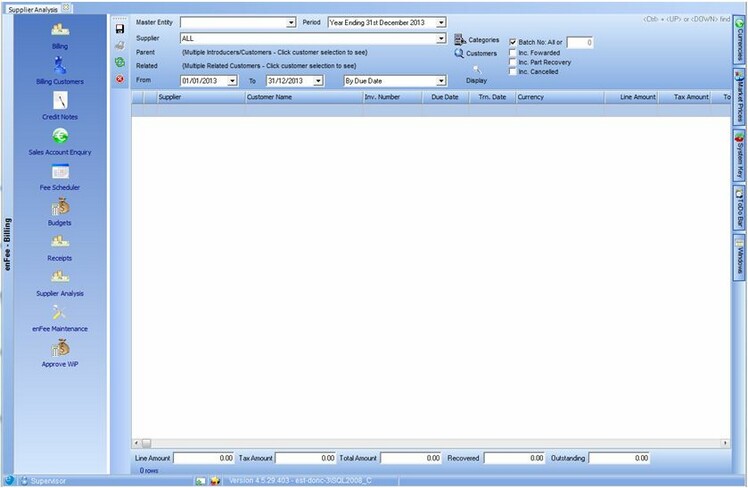
An example and explanation of the screens are shown below.
Firstly, any invoices created in the Billing Tree have the potential to be pulled through into the Supplier Recovery screen. However, this depends on the invoice lines used – as only certain ones can be allocated.
The user can configure these within enFee maintenance > Fee Lines, any sub-types set to ‘Forward on Receipt’ are valid (see below).
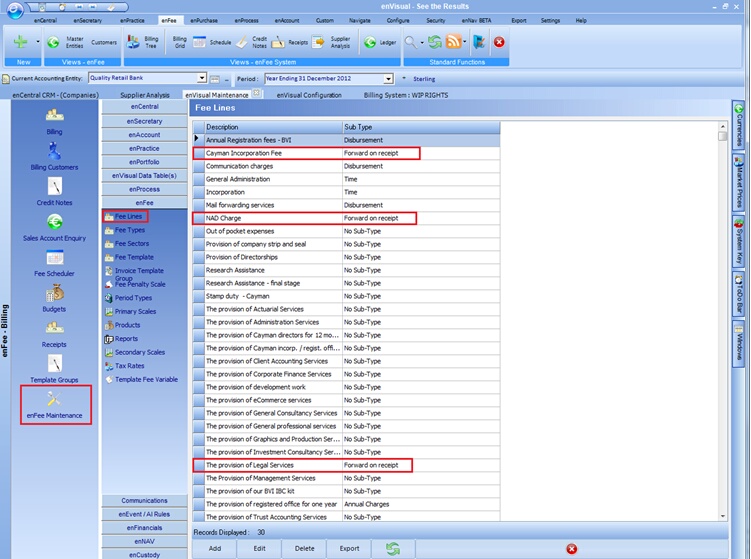
These come into effect when creating a new invoice in the billing tree section of enFee, on the invoice lines page the user should see the below screenshot or similar by default.
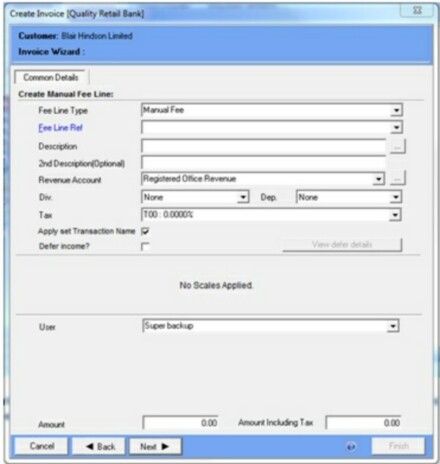
The user will be required to change the ‘Fee Line Reference’ to a suitable fee line (Forward on Receipt) in order to be able to post to the Supplier Recovery.
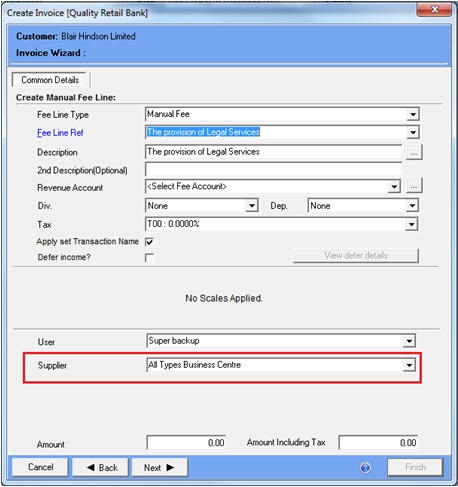
Once a forward on receipt line has been selected, you should notice the screen change – noticeably at the bottom where it says ‘User’, it should now also say ‘Supplier:’ as shown below.
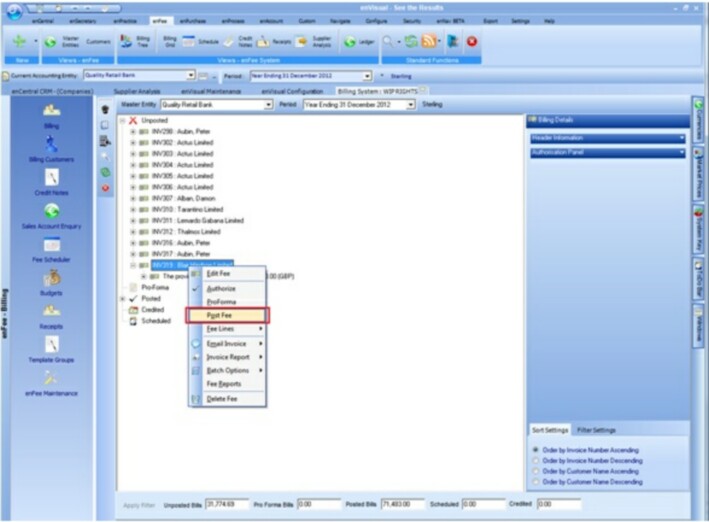
Once the invoice has been posted, the user will be required to post the invoice via right clicking and selecting ‘Post Fee’. This will cause the invoice to appear in the Supplier Recovery section where the user can keep track of what has been paid and what is outstanding etc.
If you now go into Supplier Recovery, tick ‘Inc. Forwarded’ and ‘Show’, you should see your invoice in the list returned – this will show the invoice number, date due, currency etc. as well as information such as the invoice line amount and how much is still outstanding as shown below.

Now if the user was to go into the Receipts tab, they could issue a receipt for this invoice, in this case – INV319. Issuing a receipt will update the supplier recovery accordingly. In this case, I will issue for the full £10,000.
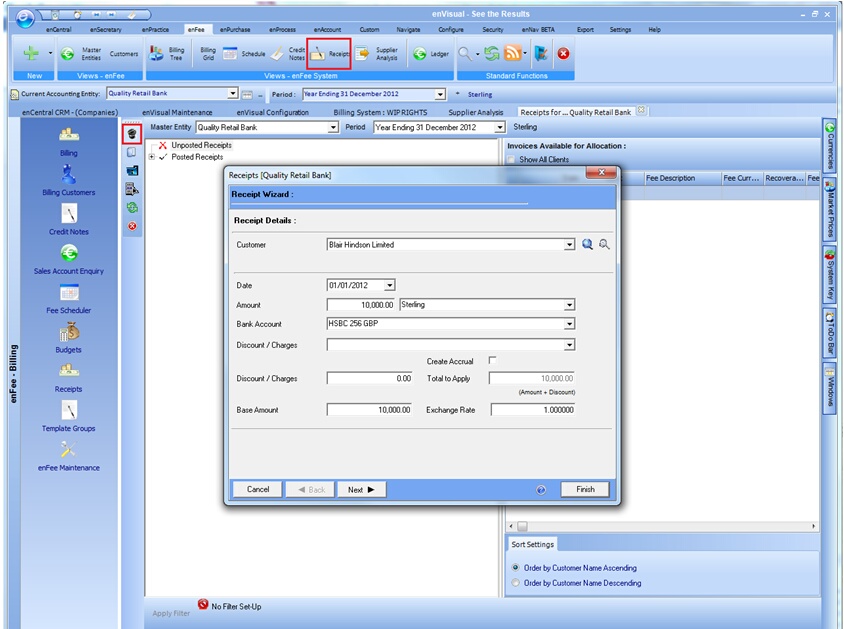
Once finished, the system will show the newly created receipt as Unposted, selecting this should show the user the available allocations for this receipt as shown below – you can see that it identifies INV319 as a valid allocation. In order to do this, I must first post the receipt.

To post the receipt, simply right click the desired receipt and select ‘Post Receipt’, this will move it into the Posted section, where you can now allocate it to the invoice as necessary. You do this by dragging and dropping the receipt.
That is, as shown above – you would drag the highlighted section on the left (‘10000.00 : 10000.00 GBP’) into the right hand box.
This will open up the following screen.
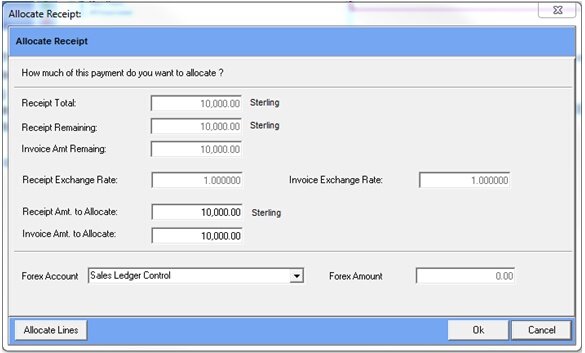
From here, the user will need to hit ‘Allocate Lines’ once they are happy with what they see. This will allow you to select a valid line from the invoice, to allocate the receipt to – the Allocate Lines screen is shown below.
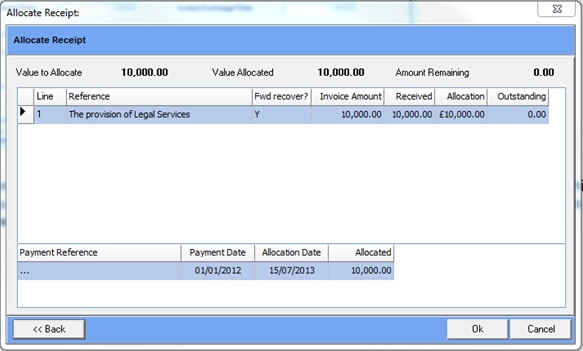
As you can see, this is the line I created within INV319 for this demonstration, select the appropriate line and hit ‘Ok’ to finish. You will notice on the Receipts screen now that the receipt you created will now look different, in my case it now states ‘10000.00 : 0.00 : GBP’ instead of ‘10000.00 : 10000.00 : GBP’.
This is because originally it was a receipt for 10,000 and had 10,000 remaining for allocation. Now, it has 0 remaining for allocation.
Now when the user goes back into Supplier Analysis and refreshes (hit ‘Show’ again), presuming that they allocated the whole amount, the line will now be shown in bold text. This shows that the invoice is ready to be completed.

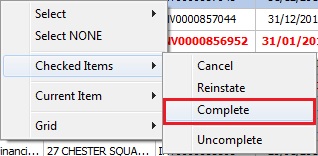
Once satisfied that this is correct and nothing more is required for the invoice, right click the invoice and select ‘Complete’ – this will turn it green in colour, as you can see above.
Grid Colour Legend
The Supplier Recovery grid uses a number of colors to denote the current status of each line as necessary, these colors are explained below.
Grey - Cancelled Line(s)
Black - Fee's not yet paid in full
Bold Black - Ready to Complete
Green - Completed
Red - Exported
When a fee is completed, a tick will appear on the far left of the Supplier Recovery grid for that line. This tick remains even after a 'Completed' fee is exported (turning it red). This is so that users are aware
Print Report(s)
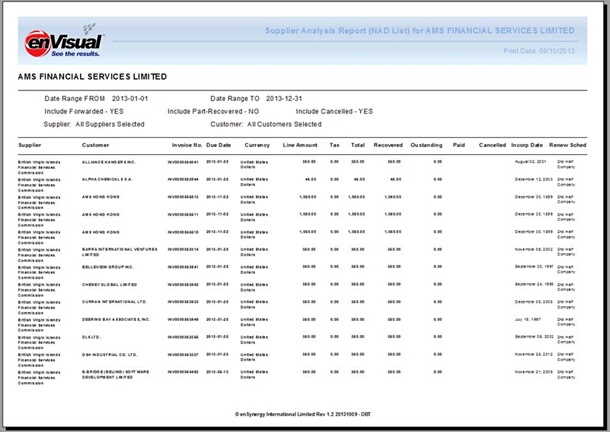
The screen also includes a print icon to produce a report which replicates the screen data. This option is available on the left hand side of the screen and is only available when a completed invoice is selected. This is because a batch must have been assigned for the report to run.
An example of this report is shown below.
