LiveScan
This section contains LiveScan information for entity selected. LiveScan is used to perform a LiveScan risk score for entities. It is a sanction scan for specified entity details selected. Before LiveScan can be used, it has to be configured first at Settings > LiveScan > RDC. A provider is required to perform LiveScan. The LiveScan screen is made up of entity details and request history.
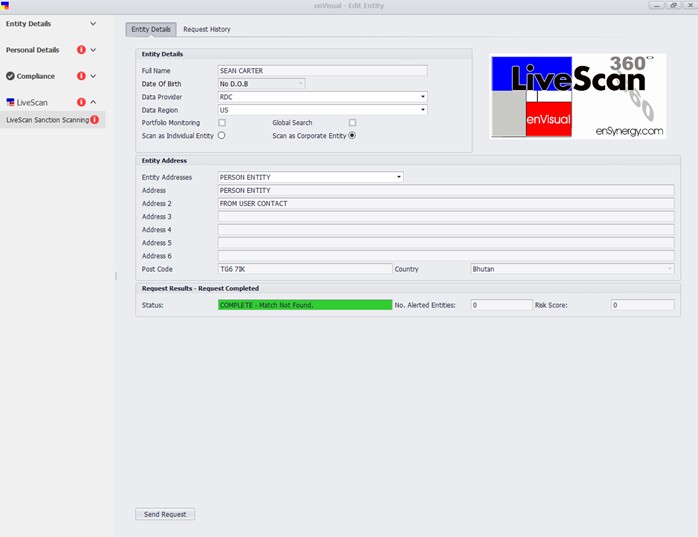
Entity Details
This section contains the following:
Full Name: name of the entity selected
Date of Birth: this will display the date of birth if the entity selected is a person entity with a date of birth details inputted in the personal details. For other entity types, No D.O.B will be displayed.
Data Provider: will display who is the provider providing the LiveScan search
Data Region: to select the data region. US and EU are the options available.
Portfolio Monitoring: to be used of portfolio monitoring is required for the entity selected. When ticked will indicate portfolio monitoring is been done for the entity.
Global Search: to be used when a global search is required. When ticked, the search result will include a global search.
Scan as Individual Entity: when selected, will indicate an individual LiveScan is been done.
Scan as corporate Entity: when selected, will indicate a corporate scan is been done.
Entity Address: the entity address dropdown can be used to select an address for entity with more than one addresses. A LiveScan can be done with and without an address.
Send Request: button to be used to perform the LiveScan when the entity details section has been completed. The ‘Send Request’ button is controlled by security which can set at Settings > Security > System Security > Compliance > RDC > Perform Scans
To make a LiveScan search, on the entity details page, click the Send Request button. Progress of the search will be displayed in request result section. This will be displayed during the search.
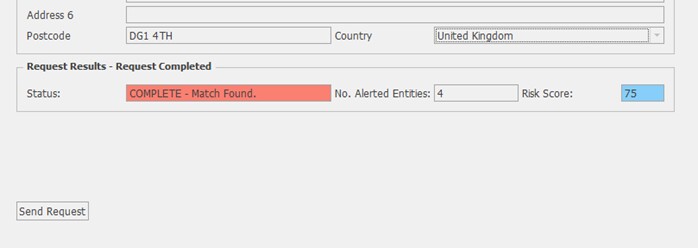
When completed, a status with Complete – Match Found will be displayed in red, risk score displayed in blue and with amount of No Alerted Entities, while a status with Complete – Match Not Found will be displayed in green.

Request History: this section will be used to view detailed information about the LiveScan search result. This tab is made up of 2 sections: request history and request alert entities.
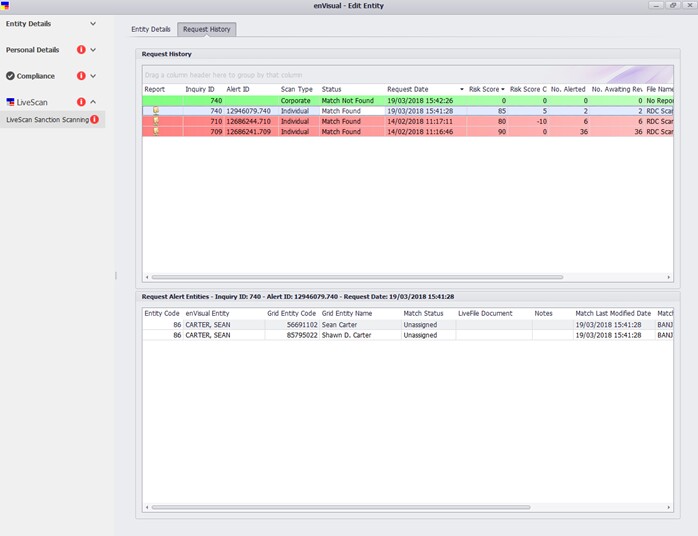
Request History: this section will display list of searches that has been made for the entity. Each search will be displayed with an inquiry id, alert id, status, request date, risk score, risk score change, no alerted, no awaiting review, file name, description and user code. A match not found will be displayed in green while a match found will be displayed in red.
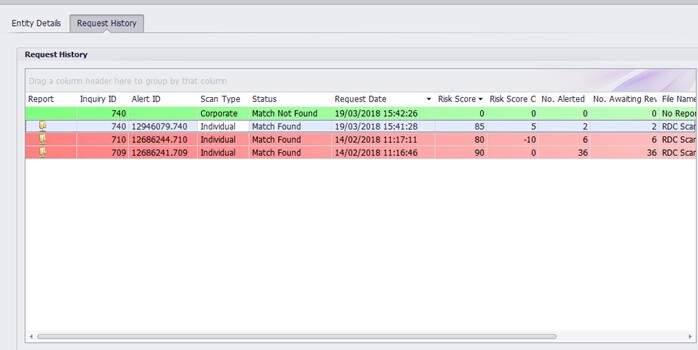
Report: will display with a folder icon when a match has been found for the search.
Inquiry ID: a unique reference number for the entity LiveScan.
Alert ID: a unique reference number for alert id found with the LiveScan result. Alert ID is only displayed for a match found, with a match not found, an alert id is not displayed.
Scan type: this will display the type of scan it was between an individual and a corporate scan.
Status: this will display the outcome of the search if a match was found or not. Options are match found and match not found.
Request Date and Risk Score: this shows the date and time when the search was done and the risk score given by the provider.
Risk Score Change: this will display the change in risk score for the entity from the previous search done. Basically, display if there’s been a change in score for the entity from when the last search was done.
No Alerted: this displays the number of alerted link that is related to the search done for the entity.
No. Awaiting Review: this shows number of alerted links still awaiting reviews. Once an alerted link has been reviewed, the number will be reflected and updated here.
File Name and Description: this only display when a search is found with file present for the search, also with description.
User Code: this displays which users performed the LiveScan.
Request Alert Entities: this section shows additional information about a positive match found for an entity LiveScan. To view such information, select a positive match found in the request history top section, which will then use the inquiry id, alert id and request date to display more information about the LiveScan.
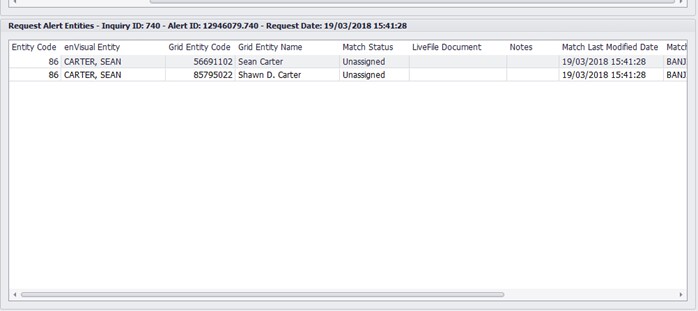
The middle section will display the inquiry id, alert id and request date details.
Other information found here are:
Entity Code and Envisual Entity: this will be the same for all the result displayed in the grid here. This is because they are all linked to the entity selected.
Grid entity code and name: this will be different on each grid to match the code and name found
Match status: this will display the status of the result entity. Unassigned will be displayed until user edit the status to either positive or false. More about edit match result can be found below at the end of this section.
LiveFile Document and Notes: will show if the result has a file linked to LiveFile and display notes added for it.
Match last modified date and by. Shows when it was last modified and by which user.
Request date and Risk score: will display the search request date with each grid score for the entity.
Other options found in right click options here are:
Mark as False: to indicate the result found is false and this will highlight the grid line in green.
Mark as Positive: to indicate the result is a positive match and will highlight the grid line in red.
Edit Match: to edit match status and viewing any attaching document linked with LiveFile.
Edit match when selected, will display below
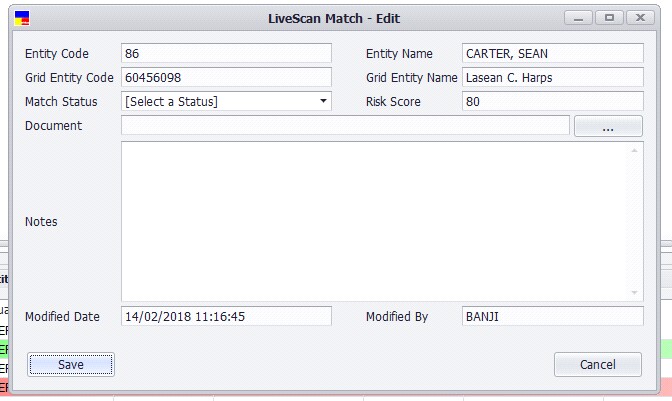
This form will contain information displayed on the grid for the grid line selected. Most of the information displayed are not editable apart from match status, document and notes sections.
Match Status: this can be positive or false. A positive means it matches the entity selected and false means it does not match. A positive will be highlighted in red on the grid while a false will be highlighted in green. Note: this will then update the No. of Awaiting Review in the top section (request history) of the grid. This will then help for easy access when next a search is done in displaying the result.
Document: this can be used to link a file/document from LiveFile by click the ….. button and view the file with the ~ button next to it. This view button is only available when a document has been attached.
Notes: to input any relevant information.
When finish editing, click the save button to update the details on grid to display as shown below
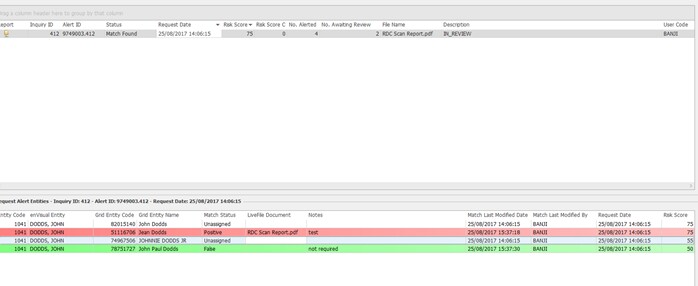
These right click menus are controlled by security which can be set at Settings > Security > System Security > Compliance > RDC