To add a user to the system you can either press the Add-User button from the security tab in enVisual or you can click the add user button from the users Screen, pressing both buttons use the same add user wizard which is detailed below.
The Add User Wizard alters slightly depending on which options are selected, for example if you select ALLtime user, then the ALLtime options will be displayed.
The first screen of the add user wizard is used to add the users personal details as shown below.
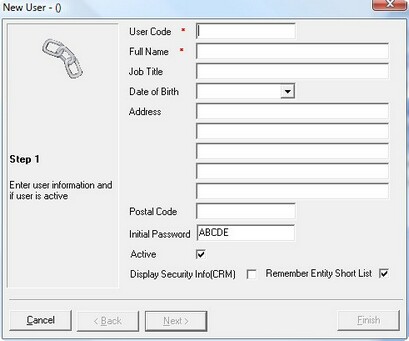
On this screen you need to enter the user code and full name for the new user, additionally you can enter the users job title, date of birth and address.
At the bottom of the screen you need to enter the initial password for the user, this defaults to the system default password.
Active - The option is the flag that controls whether the user account is enabled or not - when unticked, access to the system as this user will be denied and must be (re)enabled by an administrator.
Display Security Information - this option means that in the CRM if there are any entities hidden due to security, there will be a message at the bottom showing how many entities are hidden due to security.
The second screen in the wizard is shown below, this screen is used to select user groups and additional options
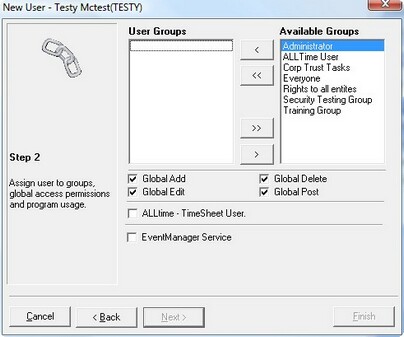
This screen shows all of the user groups in the system, you can select which groups to add the user to, and which groups to remove the user from. You can use the add, add al, remove, remove all buttons to manage which groups the user belongs to.
Global Add - this option means that the user will be able to add items in areas that their assigned user groups have security, unselecting this option means the user can not add any items to the system.
Global Edit - this option means that the user will be able to edit items in areas that their assigned user groups have security, unselecting this option means the user can not edit any items to the system.
Global Delete - this option means that the user will be able to delete items in areas that their assigned user groups have security, unselecting this option means the user can not delete any items to the system.
Global Post - this option means that the user will be able to post items in areas that their assigned user groups have security, unselecting this option means the user can not post any items to the system.
ALLtime - this means that the user is an ALLtime user, and can enter time and expenses in the ALLtime module. Selecting this option will add extra screens to this wizard to capture ALLtime information.
The next screen only appears if you select the ALLtime option, if you do not select the ALLtime option you can skip this screen and the next screen.
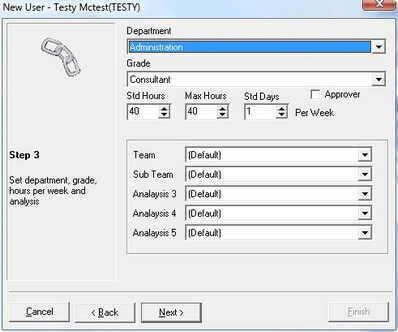
This Screen is used to select the department for the user, which grade they are on, and the number of hours they work a week. This Screen is only shown if the ALLtime option is selected on screen 2.
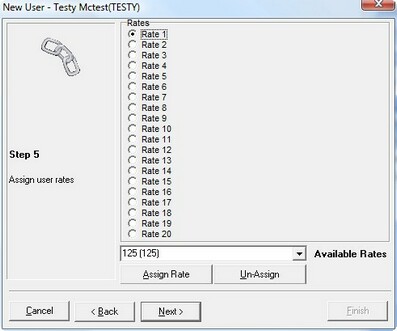
When entering time a user needs to select a rate of pay they did that work at, this screen is used to enter the different rates of pay used by the user. This Screen is only shown if the ALLtime option is selected on screen 2.
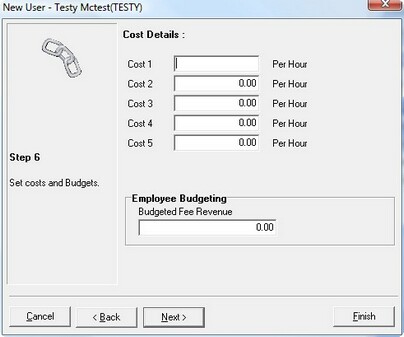
This screen is used to enter any costs that are to be associated with this user, these costs are used in enPractice.
-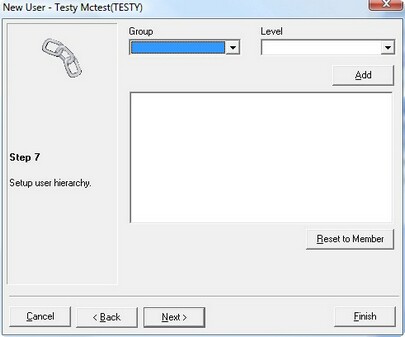
This screen is used create a user hierarchy, in which you can select a group from the list and then select a level, then when you press the add button, the selected group will be added to the selected level.
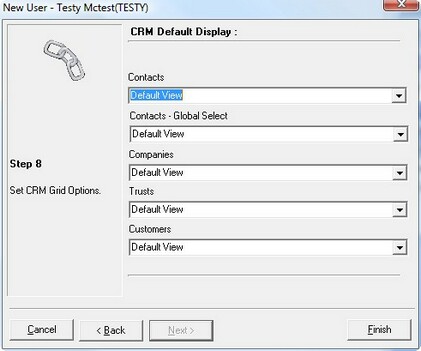
This final screen in the add user wizard is used to select which view is used when this user opens the different areas of the system. As the system supports custom views this is used to change which view this user uses.
Clicking Finish will now close the add user wizard and add the user to the system.