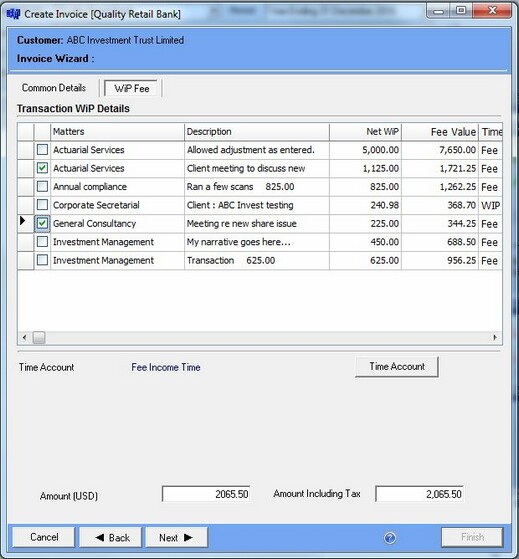
To create a manual WiP fee, create an invoice via enFee and select the appropriate WiP line type in the 'add line' section of the invoice wizard. Once selected, the 'WiP Fee' tab should appear next to common details, allowing the user to select the required WiP entries for the invoice.
![]()
WiP fees are Based on a project, meaning WiP will need to be posted for the chosen customer in order to create a WiP line invoice - see Work in Progress.
Select a Line Code, a User and a Tax Code as required.
Once the first page is sufficiently populated, select the 'WiP Fee' tab to view all available WiP for the selected customer. Numerous lines can be chosen (each will be created as a separate invoice line) to save time. If the user selects multiple WiP lines, a button allowing the selecting of time (revenue) account will appear, this links all chosen WiP to the selected time account (if different accounts are required, the user should only select and create 1 line at a time).
Note: Alternatively, tick the 'Use this for WiP' checkbox on the Common Details tab to use the selected 'Revenue Account' over the advised 'Time Account'.

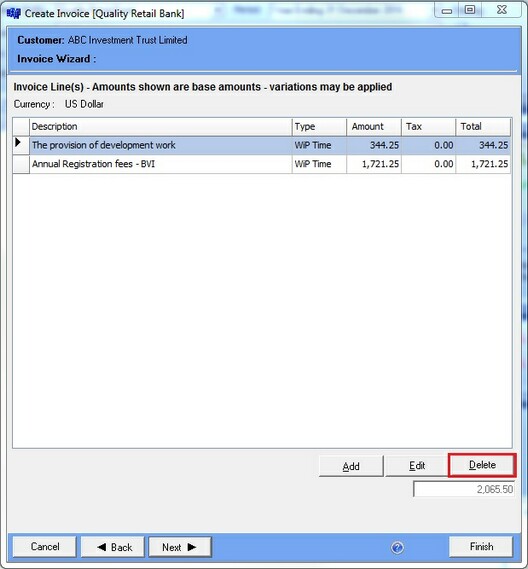
Once the necessary lines are added, they will display on the Invoice Line(s) page as usual. To remove the line(s) from this section, click on the transaction line and select the delete button.

Each WiP posting can only be selected once, when editing a WiP line invoice, the 'used' line will display with a 0.00 value so that the user does not erroneously select it again. When creating another new WiP line invoice, the previously used WiP will not be available for selection. If the existing invoices or lines are removed from the system, the WiP lines will be usable once more.