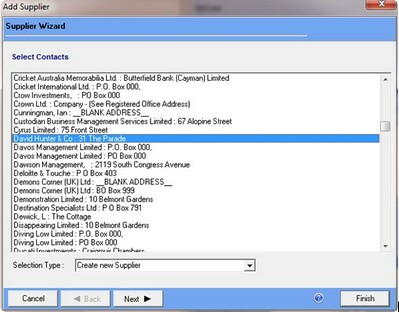
To add a new supplier to the current entity, click on the + button to the left of the supplier screen. This will display a list of all CRM entities.

Select the supplier you wish to set up and click on the next button.

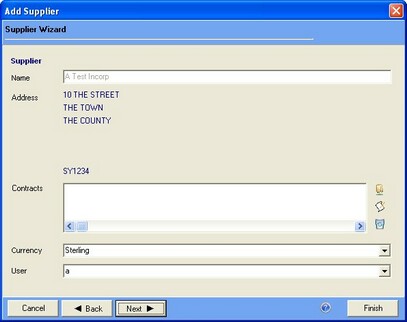
The default address will be selected and the currency will automatically be set to the currency of the entity you are attaching the supplier to. This can be changed here. You can also set the responsible user at this stage. Click on the next button to continue the supplier set up.

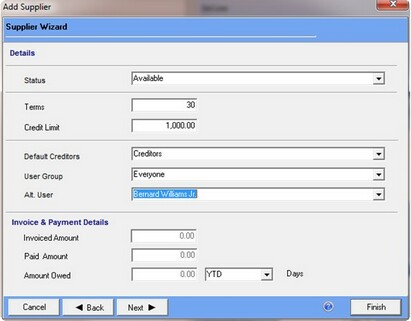
This screen allows you to set up some basic details for the supplier.
Status: This user definable list that can be used to categorize suppliers.
Terms: Supplier terms expressed in Days.
Credit Limit: Credit limit with this supplier.
Default Creditors: This will default to the creditors control account set up for the current entity. You can select a different account here if you wish to separate accounts payable for example by supplier currency.
User Group/Alt User: This allows you to add group responsibility to a supplier and add an alternative responsible user.
Invoice & Payment Details: This part of the screen is automatically updated when invoices are processed and can be viewed at any time by editing the supplier.
Click on next to add tax and analysis codes.

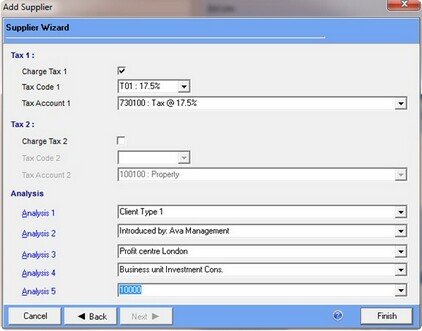
This screen allows you to add two tax codes for the supplier. A third code of 0% is always available when processing invoices. If the user ticks the box for a tax code then they must also specify the tax account to be used when posting.
The Analysis section is used mainly for reporting and providing management information, these codes are configured centrally in enPractice.
Once satisfied with all information, click on finish to complete the supplier set up.